
MikroTik CHR: How to set-up PPTP VPN Server (+ video)
Setting up a PPTP VPN server on a MikroTik router is one of the fastest ways to get a basic VPN up and running — whether you're working on a MikroTik Cloud Hosted Router (CHR) or a physical MikroTik device. This guide walks you through the complete process step by step, covering both the WinBox 4 interface and the RouterOS CLI.
Here's a video overview of the full setup before we get into the details:
Table of Contents
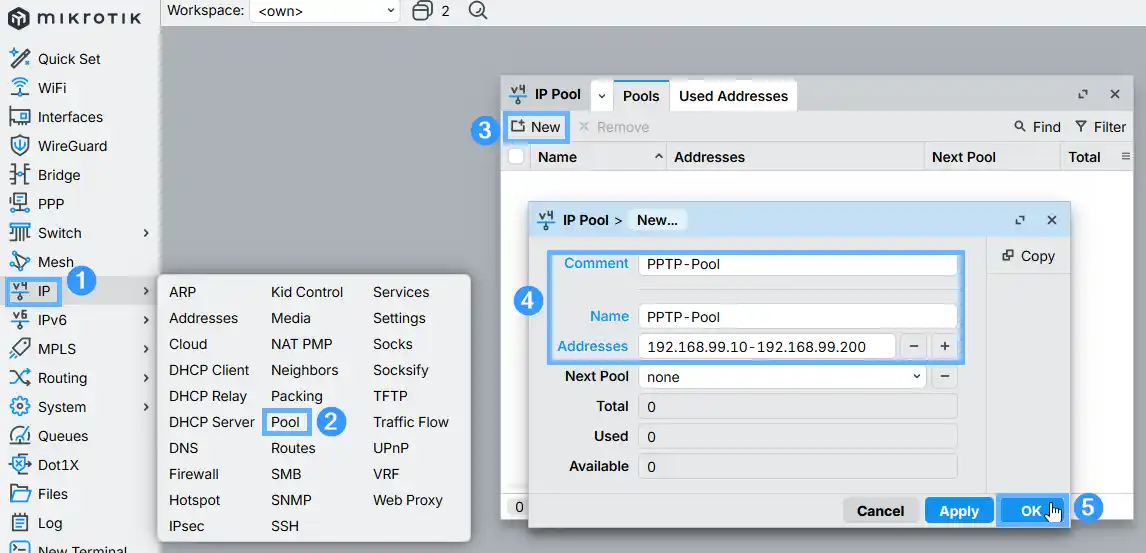
The IP pool defines the range of addresses that will be assigned to connecting VPN clients. Every user who dials in to your PPTP server will receive an IP from this pool, so size it accordingly. Go to IP > Pool and click New. Give the pool a descriptive name and enter the address range in the Addresses field.
Both CIDR notation (10.0.0.128/25) and range notation (10.0.0.128-10.0.0.254) are supported, though range notation is generally clearer for single-subnet use cases. You can add additional ranges by clicking the + button next to the Addresses field.
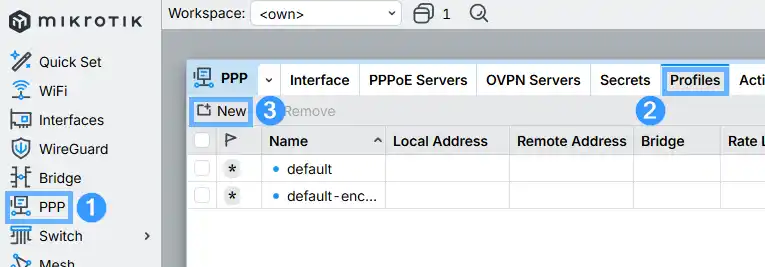
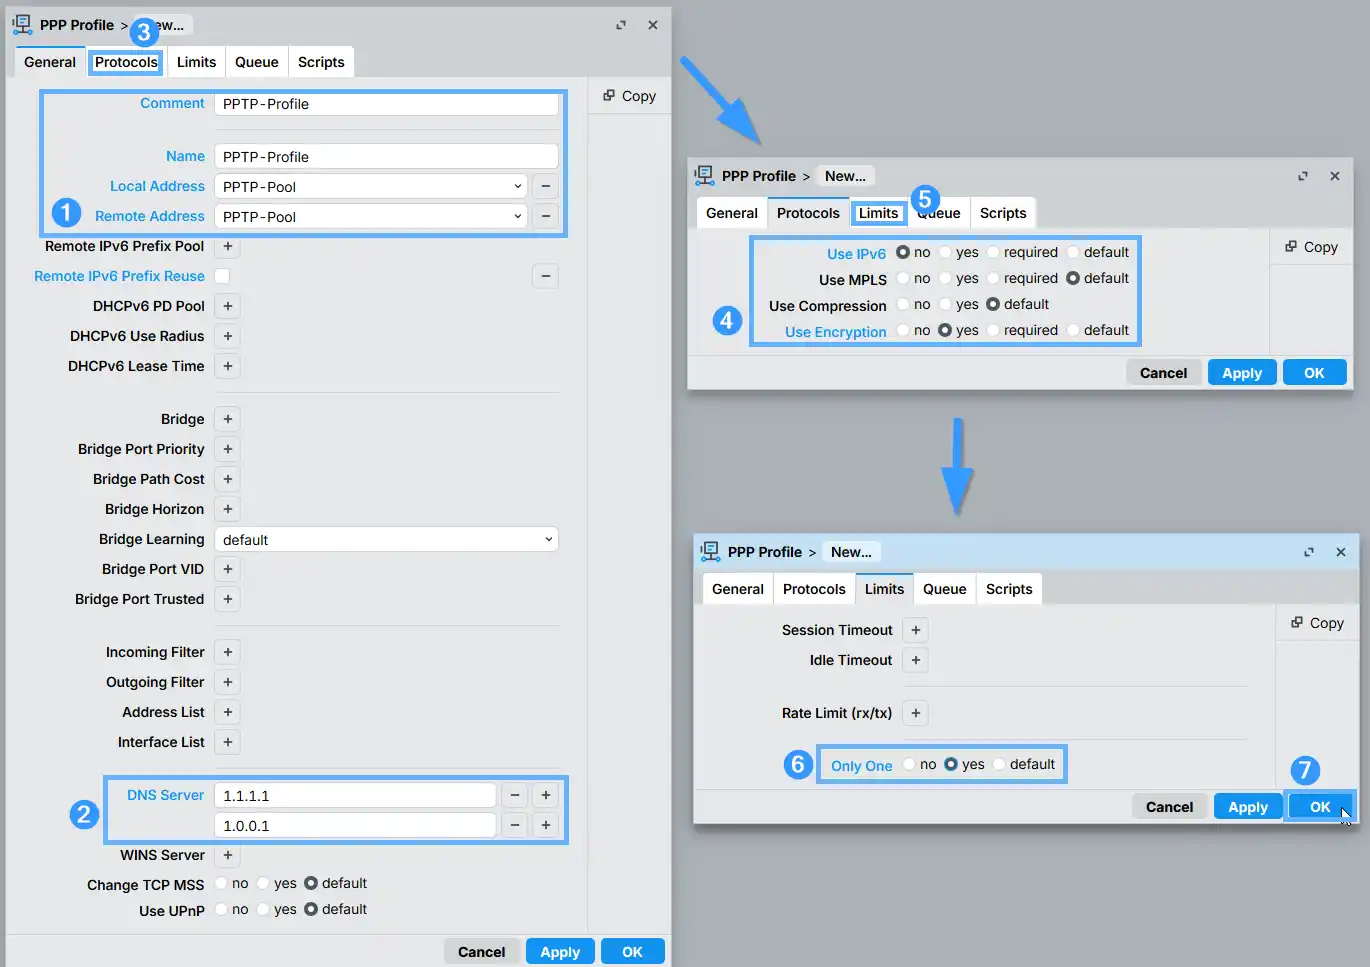
For most basic setups, the built-in default-encryption profile is perfectly fine. If you need to customize connection parameters — things like speed limits, DNS servers, encryption settings, or IPv6 behaviour — you can create a dedicated profile instead.
In this example, the profile uses encryption, custom DNS servers (1.1.1.1 and 1.0.0.1 from Cloudflare), our IP pool from Step 1, and restricts each secret to a single concurrent session. Go to PPP > Profiles, click New, and fill in the tabs as described:
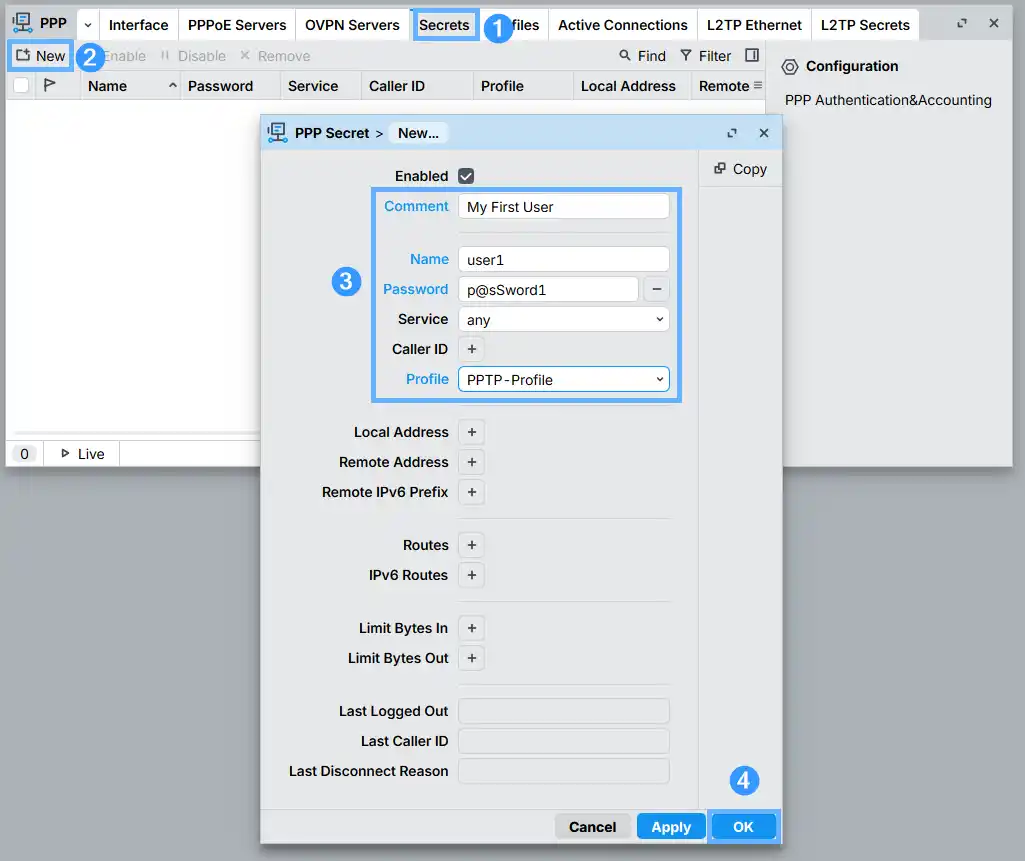
PPP Secrets are the user accounts for your VPN. A single secret works across PPTP, L2TP, SSTP, and OpenVPN simultaneously — you can restrict which protocol a user can connect via by changing the Service field if needed.
Since we're using a PPP profile that assigns addresses from the pool automatically, you don't need to set individual local or remote addresses per user — the profile handles that. Go to PPP > Secrets, click New, enter the username and a strong password, then select the PPP profile you created in Step 2 (or default-encryption if you skipped that step).
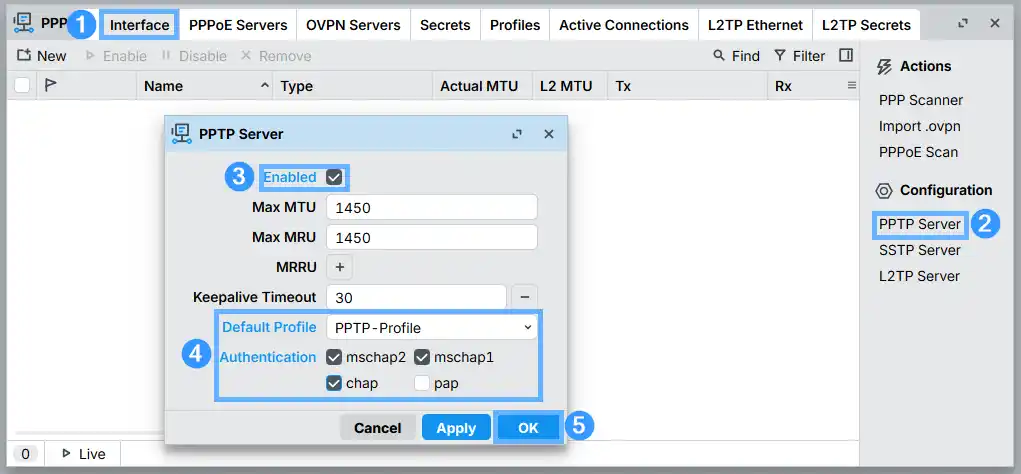
With the pool, profile, and users in place, enabling the PPTP server is a one-step operation. Navigate to PPP > Interface, then click PPTP Server in the side menu. Tick the Enabled checkbox, set your custom profile as the default (or leave it on default-encryption), and make sure the chap, mschap1, and mschap2 authentication methods are all checked.
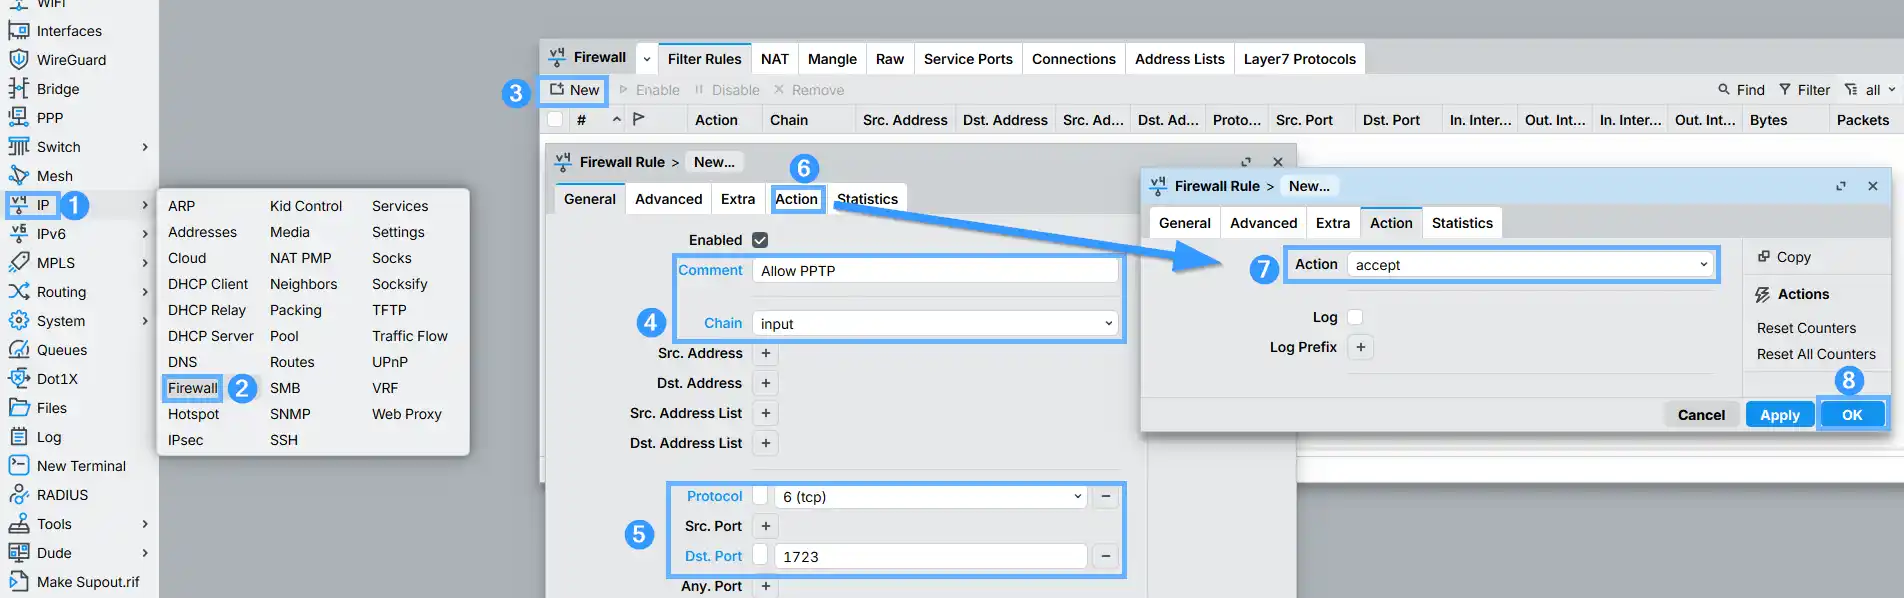
If your MikroTik CHR or physical device runs a restrictive firewall — such as the one described in our basic CHR security guide — you'll need an explicit rule to let PPTP connections through. Without it, inbound traffic on TCP port 1723 will be silently dropped and no clients will be able to connect.
Go to IP > Firewall, click New, and create a filter rule with these settings: chain input, protocol tcp, destination port 1723, action accept.
When the rule is saved it lands at the bottom of the firewall list, below any drop rules — meaning it won't actually work yet. Drag it above the first blocking rule so it gets evaluated first. In WinBox, this is just a matter of dragging the row up the list:
For CLI users, first print the existing rules to find the correct position, then use place-before to insert the new rule above the first drop rule. Replace X with the rule number from the print output:
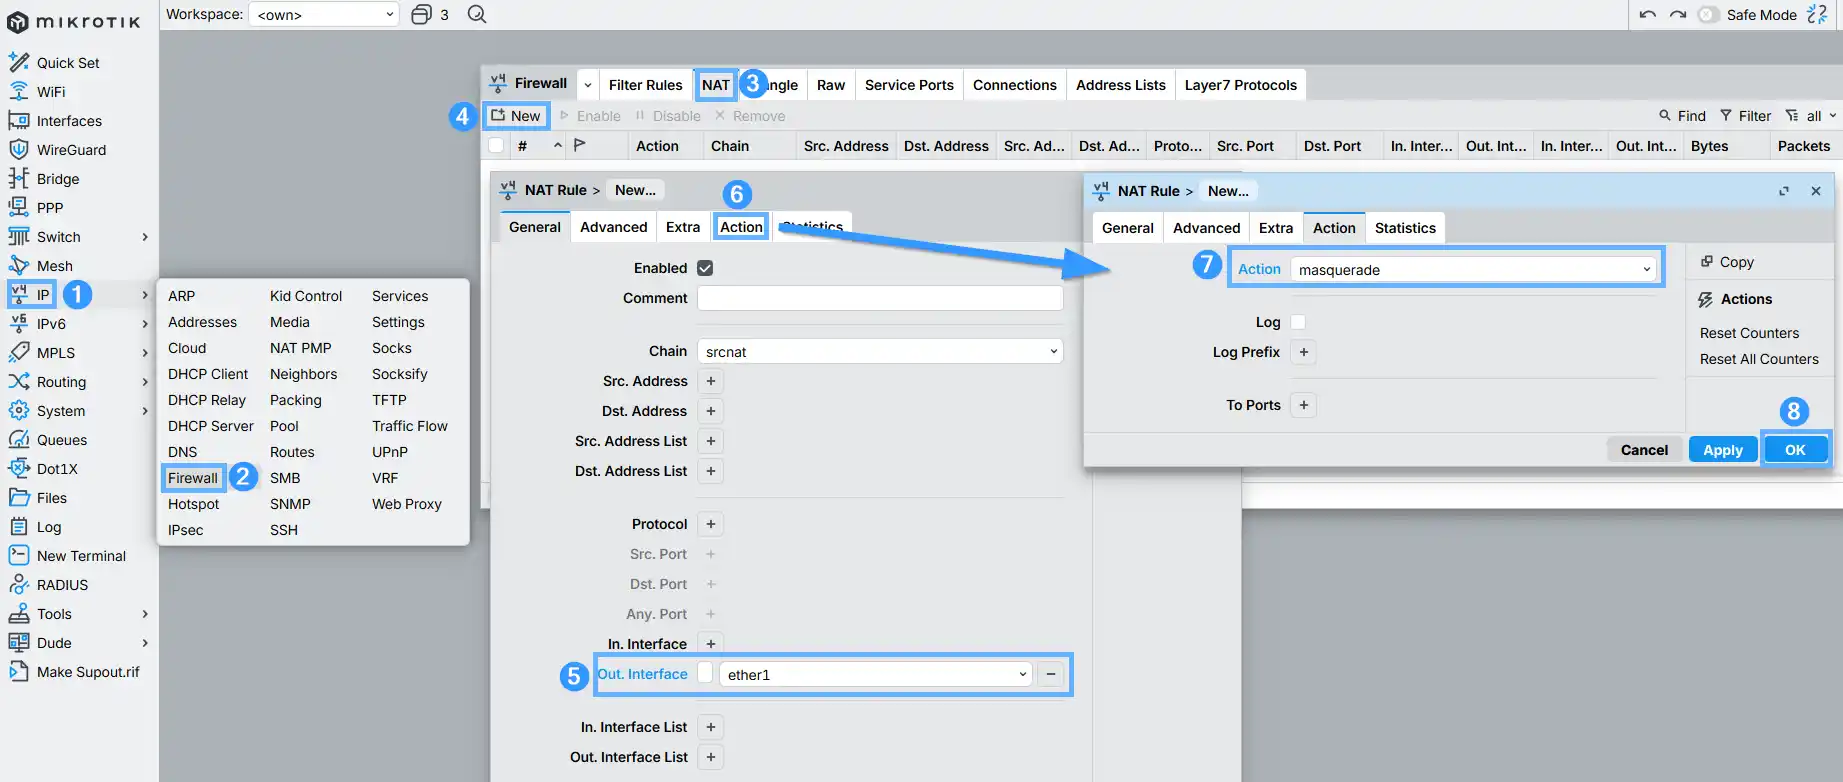
This step is easy to miss, but without it your VPN clients will reach your router and nothing else — no internet access, no external resources. A masquerade rule in the NAT table is what makes the traffic routable from your VPN subnet out to the internet.
Go to IP > Firewall > NAT, click New, and set chain to srcnat, out-interface to ether1 (or whichever interface carries your WAN connection), and action to masquerade.
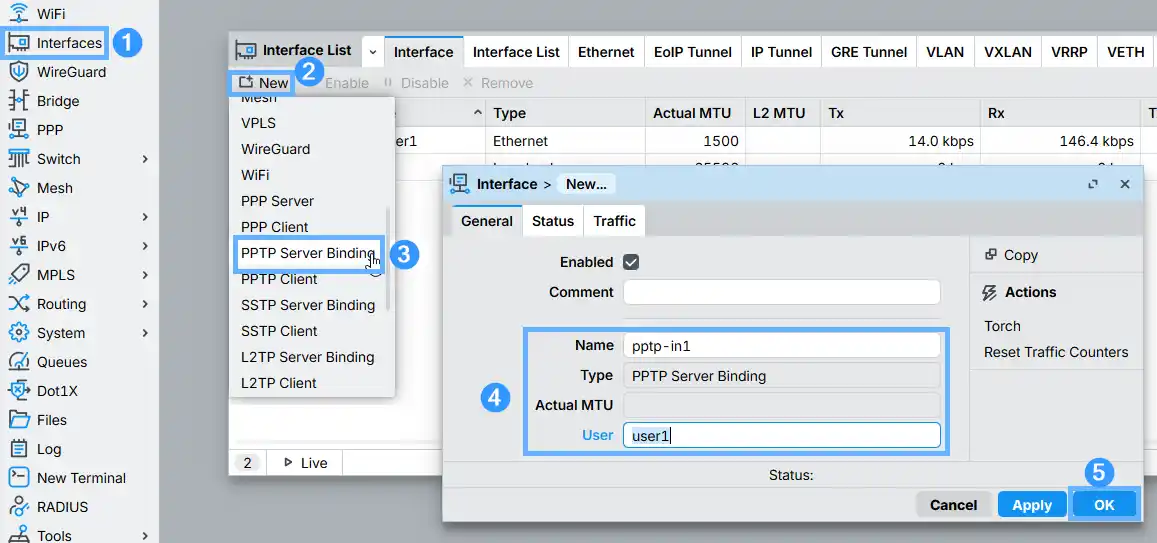
By default, each PPTP connection gets a dynamically named interface (like <pptp-user1>). Creating a static server binding ties a fixed interface name to a specific username, which makes it much easier to reference that connection in firewall rules, apply per-user traffic policies, or monitor usage over time.
To add a binding, go to PPP > Interface, then click PPTP Server Binding in the side menu (or use the Interface list directly as shown below). Enter a name for the interface and set the User field to the PPP Secret username you want to track:
That's everything — your MikroTik router is now set up as a PPTP VPN server and ready to accept client connections. The same setup works on both MikroTik CHR instances and physical RouterOS devices.
Looking for other VPN protocols?
Need a MikroTik CHR to run your VPN server on? BGOCloud's MikroTik VPS plans give you a fully licensed Cloud Hosted Router with SSD-backed performance, a public IP, and unlimited traffic options — deployed in under a minute. Everything in this guide works out of the box on our CHR instances.