MikroTik CHR: Upgrading to RouterOS v7 (+ video)
The new MikroTik RouterOS v7 is now faster. It’s great even for older MikroTik RouterBoards.
What’s new:
- Optimized Routing
- New BGP, now faster and has lower RAM usage.
- New User Manager
- WireGuard and ZeroTier support
- Support for conteinerisation and Docker
- Easy integration with the new MikroTik Back To Home client
- and many more…
In this article, we will show you how to upgrade your Cloud Hosted Router to the new RouterOS v7.
If you use CHR with with a trial license, please note that you might not be able to upgrade your CHR, if the trial has expired.
Here's a small video, showing the process:
1. Upgrade via the Package manager
To upgrade your router to v7, go to System>Packages and then click on "Check for updates".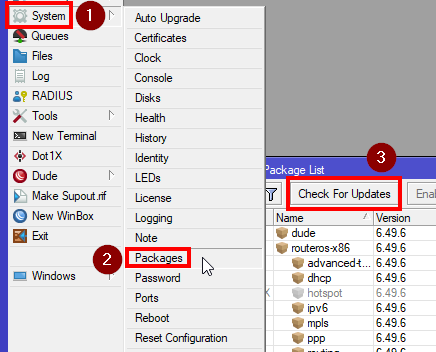
Then choose the "upgrade" channel and then either choose Download or Download and Install. Choosing Download and Install will reboot the CHR as soon as the update is downloaded.
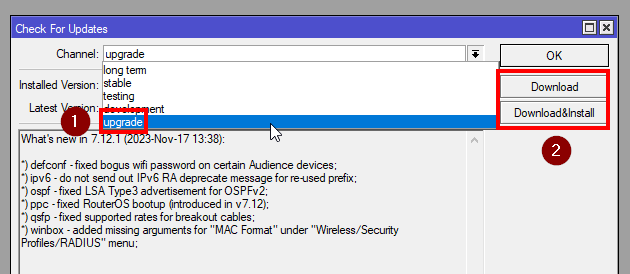
As of time of writing, from RouterOS v7.13 the Wireless functions are being seperated from the main package. For the latest version of MikroTik RouterOS v7 you may need to do the upgrade to v7.12 and then update to the latest version.
However, if you experience issues upgrading via the Package Manager, you can try the second upgrade method.
2. Manual upgrade via a package file.
Go to https://mikrotik.com/download and under Cloud Hosted Router, download the latest stable main package for RouterOS v7.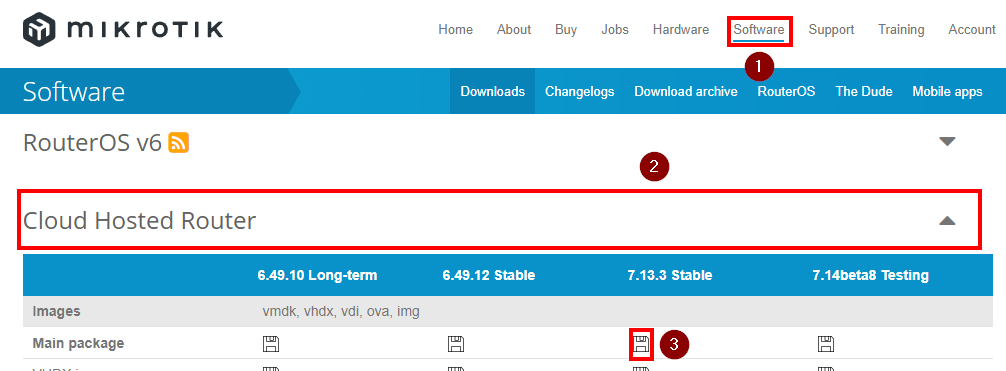
After the download is finished, log in to your router with WinBox and click on “Files”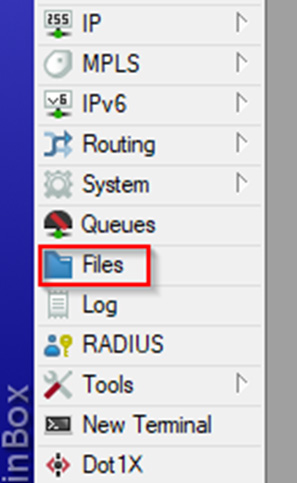
Then simply drag the downloaded routeros-7.X.X.npk to the files window in WinBox.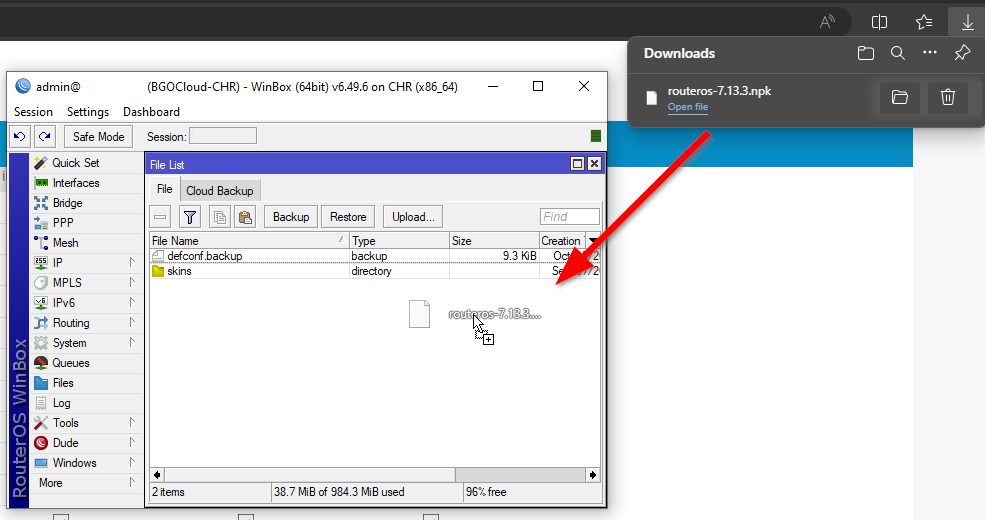
After the transfer is done make sure that you’ve backed up your configuration. When you’re ready, reboot your MikroTik router by going to System>Reboot.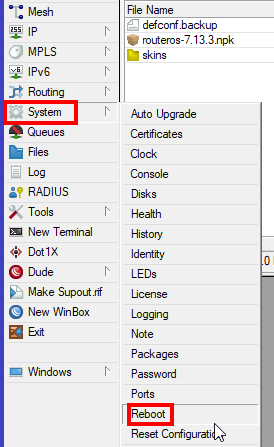
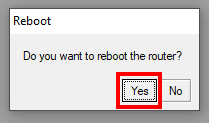
Now your router has the latest version of RouterOS v7.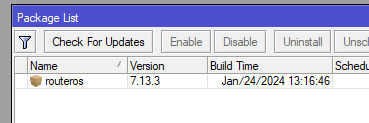
Take a look at our powerful MikroTik VPS servers and choose a suitable plan to get started.

