
Connecting your computers to WireGuard VPN hosted in MikroTik
This guide walks you through connecting a Windows, macOS, or Linux computer to a WireGuard VPN server hosted on a MikroTik Cloud Hosted Router (CHR) or any physical MikroTik device running RouterOS v7. If you have not set up the server side yet, our WireGuard server setup guide covers the whole process in a few steps.
Table of Contents
Head to wireguard.com/install and download the installer for your operating system. Windows and macOS both have native GUI apps. Linux requires a slightly different approach:
On Linux you can also install a GUI client like WireGuard UI or manage tunnels via the wg-quick command line tool if you prefer working in the terminal.
In WinBox or WebFig on your CHR, go to WireGuard > Peers and click +. Each peer is a single device allowed to connect to your VPN server. Configure it as follows:
- Name (RouterOS 7.15+) - something descriptive like
Laptop1orWork-MacBook - Interface - select your WireGuard interface (e.g.
wg1) - Private Key - set to
autoso RouterOS generates the key pair - Allowed Address & Client Address - the VPN IP for this device; pick the next free address in your subnet (e.g.
192.168.34.2/32for the first peer) - Client DNS - the DNS server the computer will use over VPN;
1.1.1.1works well, or use the address of a local resolver on your CHR - Client Endpoint - your CHR's public IP address or domain
- Client Allowed Address (RouterOS 7.21+) - add
0.0.0.0/0to route all traffic through the tunnel, or specific IP addresses/networks in CIDR format for partial tunneling.
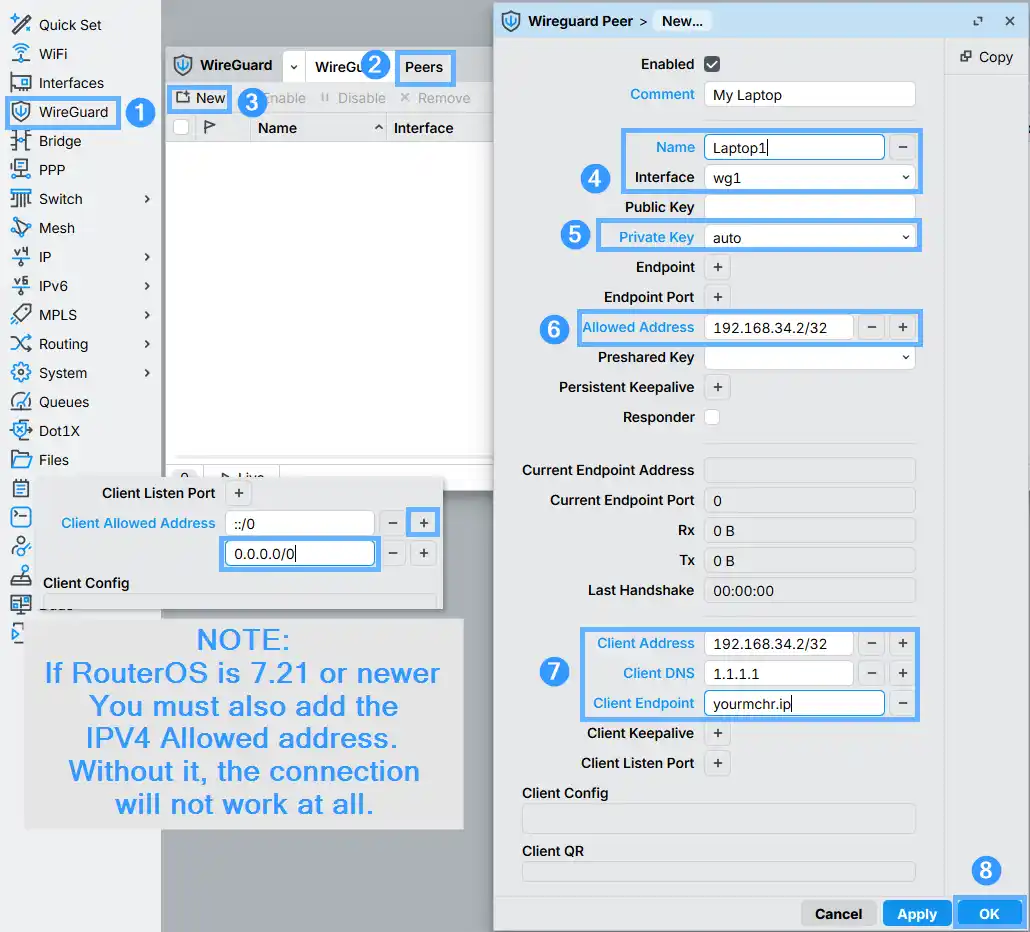
::/0. Without 0.0.0.0/0 in that field, the tunnel will establish but no traffic will route through it.Click OK. RouterOS generates the key pair and builds the configuration automatically. Scroll down in the peer dialog to the Client Config section - that is the text you will paste into the WireGuard app in Method 1, or save as a .conf file in Method 2.
![WinBox WireGuard peer dialog - Client Config section showing the auto-generated tunnel configuration with [Interface] block (ListenPort, PrivateKey, Address, DNS) and [Peer] block (PublicKey, AllowedIPs, Endpoint), with the Client QR area below](https://bgocloud.com/images/kbimages/WireGuard-GeneratedConfiguration.webp)
List all peers:
interface wireguard peers print
List peer's configuration with QR code:
interface wireguard peers show-client-configuration 0 show-sensitive
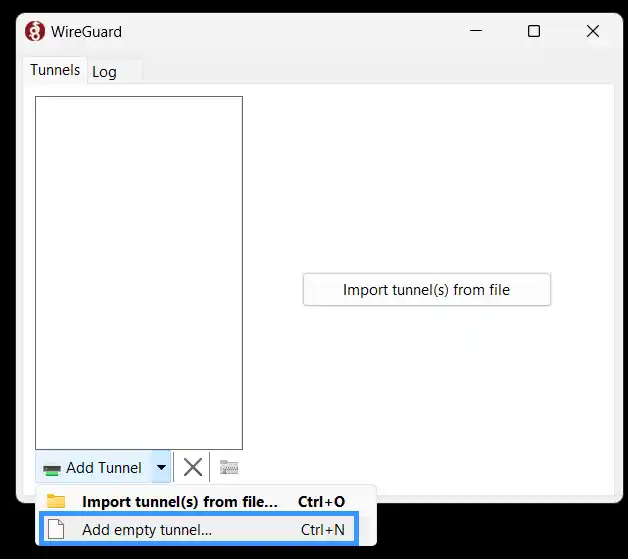
This is the fastest option when both WinBox and the WireGuard app are open on the same machine. Open the WireGuard app, click the Add Tunnel dropdown arrow, and choose Add empty tunnel… (or press Ctrl+N).
A Create new tunnel dialog opens with an auto-generated key pair. Give the tunnel a name - BGOCloudVPN for example - then select all the text in the configuration box and replace it with the content from the Client Config section in WinBox. Remove the ListenPort line if you want the app to pick a random port on each connection (recommended for desktop clients). Click Save.
![Side-by-side view: WinBox showing the Client Config section of a WireGuard peer (left) with an arrow pointing to the WireGuard Windows Create new tunnel dialog (right) - name field set to BGOCloudVPN, configuration text pasted in with [Interface] and [Peer] blocks highlighted in colour, Save button visible](https://bgocloud.com/images/kbimages/WireGuard-PCConfigCopy.webp)
The tunnel appears in the list. Click Activate to connect.

If the status changes to Active and you have internet access, the connection is working. If not and the traffic counters report ~92 bytes are received, not kilobytes, verify the firewall rules on the CHR - the WireGuard UDP accept rule must be above any drop rules, and the srcnat masquerade rule must be present. You must also check the rest of the peer configuration too.
This method lets you prepare a configuration file once and distribute it to any number of users or devices - handy for giving VPN access to colleagues without having to sit next to each machine. Create a plain text file with a .conf extension, paste in the template below, and fill in your values:
private-key=auto was used. Alternatively, open the WireGuard app, create an empty tunnel, and it will generate a key pair for you - copy the public key into the CHR peer's Public Key field instead.In the WireGuard app, click Add Tunnel, then locate and open your .conf file. The tunnel will appear in the list with the filename as its name.
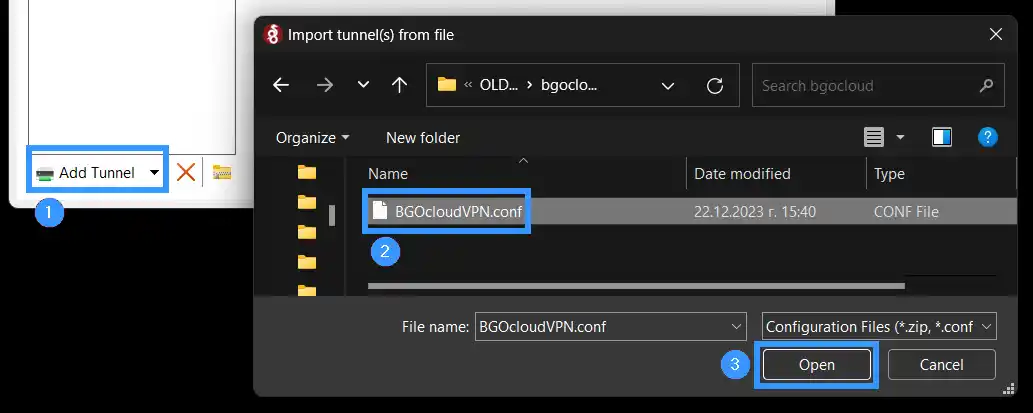
Select the imported tunnel and click Activate to connect to your BGOCloud WireGuard VPN server.
Related guides:
Need a MikroTik CHR to run your WireGuard server on? BGOCloud's MikroTik VPS plans are deployed in under a minute with full RouterOS v7 access and unlimited traffic options. Everything in this guide works out of the box on our CHR instances.