
How-to: Set Up MikroTik Back To Home via RouterOS
MikroTik's new Back To Home feature allows you to connect to your home network quickly, securely, and easily from anywhere in the world. This is accomplished with a WireGuard VPN tunnel and MikroTik relay servers.
In this article we will enable the Back To Home (BTH) Functionality via RouterOS, It can be done via Winbox, WebFig or RouterOS CLI.
Please keep in mind that this feature is available only on MikroTik devices running RouterOS with the following CPU architectures: ARM/ARM64/TILE.
We will start by logging in to your MikroTik device via Winbox, then:
- Go to IP -> Cloud and Enable DDNS by clicking Yes.
- Click on the BTH VPN tab, to go to the BTH settings.

RouterOS CLI Command:ip cloud set ddns-enabled=yes
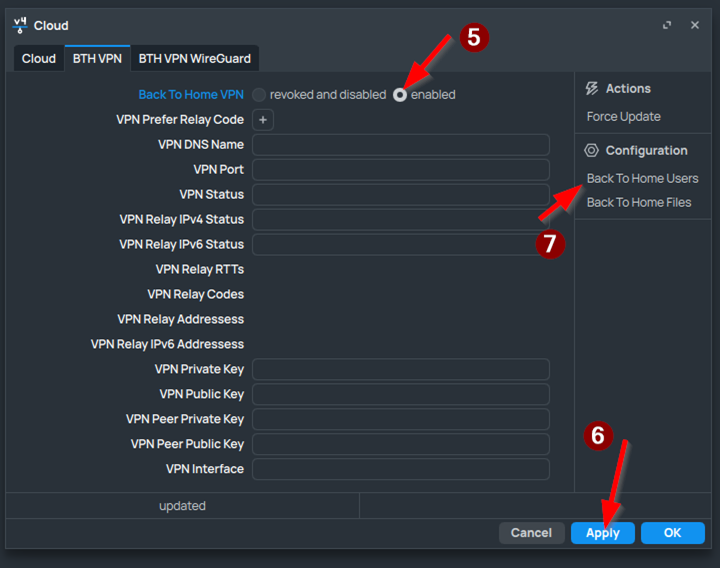
- Enable Back To Home VPN, then click Apply.
- The device will communicate with MikroTik servers to get a DDNS domain and Back To Home configuration. It will take about a minute.
- When the fields are populated, the Back To Home functionality is activated successfully and is running.
- We can start creating the first user by going to the BTH Users in the side menu.
RouterOS CLI Command:ip cloud set back-to-home-vpn=enabled
ip cloud print #checks the BTH and DDNS statuses
To create a new Back To Home user/tunnel:
- Click the New User button.
- Name the user as you like.
- (Optional) Tick the Allow LAN to allow the user to access your local network.
- Click Apply.

RouterOS CLI Command:ip cloud back-to-home-user add name="user1" allow-lan=yes #allow-lan=yes allows the created user to access the local network
- (Optional) You can enter the File Access tab if you want to allow the user to access files stored on the router.
- Pick what access to the file system the user will have (Full or Read-only). You can also choose to disable file access from here.
- Enter the file path that corresponds to the directory you want your user to have access to.
- After finishing the setup, press Apply.

RouterOS CLI Command:ip cloud back-to-home-user add name="user1" allow-lan=yes file-access=full file-access-path=<Path in Mikrotik Files> #file-access controls whether the created user has full or readonly access, file-access-path specifies the path
ip cloud back-to-home-user print #prints all Back to home users, take note of their user numbers
ip cloud back-to-home-user set <usernum> file-access=full file-access-path=<Path in Mikrotik Files> #allows file access on an existing user, where <usernum> is the number of the user
Warning: It is recommended to use a folder made specifically for file sharing. Using the root directory of your router (/) is not recommended, as the user with this path can access system files from "The Dude", "Hotspot" and "skins", backups and all other files stored in it. Users with full access to the root directory can delete these files, or upload malicious .npk files that will run malicious code after reboot.
- Enter the config menu that should appear after the user settings are applied.
- Scroll down until you see a QR code like this one. You can either share it as a screenshot or scan it directly.

RouterOS CLI Command:Note: If the QR code cannot be read, you may need to temporairly switch to light mode and/or resize it until it can be read. Adjusting the screen brightness can help tooip cloud back-to-home-user show-client-config <usernum> #prints user's configuration and QR code in terminal, where <usernum> is the number of the user
Open your Back to Home application on the phone you want to add to your VPN network.
Tap on "Join Shared" and then on the "Scan QR Code".
Scan the QR code from the Config menu, then name it as you like and tap "Import"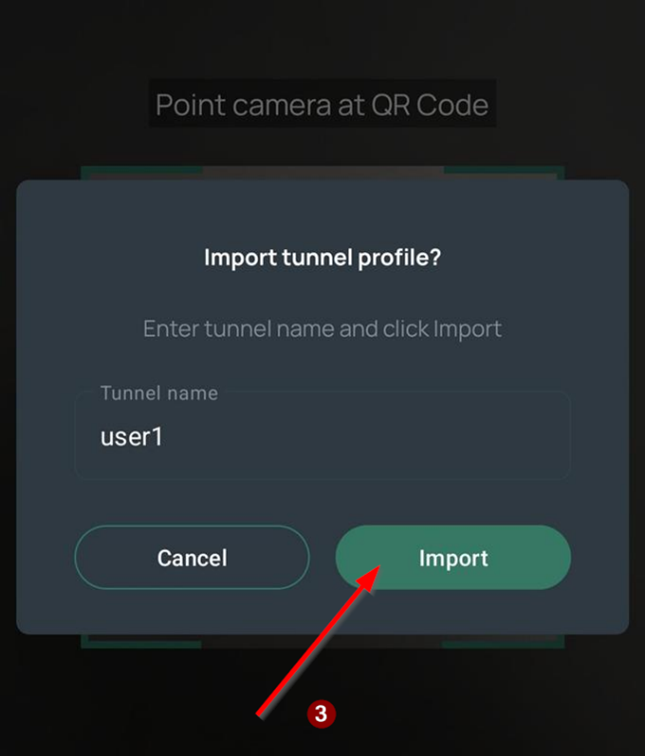
After that, the imported profile is added to the home screen and you can connect to it to access your home network and files(if configured).
Note: As of writing this article, note that Android devices will import it with management privileges(RouterOS user account required), while iOS devices will import it as a shared connection without management privileges. This might be fixed in future versions of the Back To Home app for Android and iOS.