How-to: Create and share users in MikroTIk Back To Home
Creating new Back To Home users to share your home network is really easy and done in couple of clicks or taps. In this tutorial we will create users with Winbox, RouterOS CLI and the BTH app.
If you haven't enabled the Back To Home yet, you can follow these tutorials to enable it and create the first user for it.
Enabling Back To Home via the BTH app
Enabling Back To Home via WinBox/WebFig/CLI
Creating and managing Back To Home users with Winbox
Creating a user with only internet access via WinBox and CLI
We will start by going to IP > Cloud >”Back To Home Users” and then click on “New”
Then name it as you like and click on “apply”.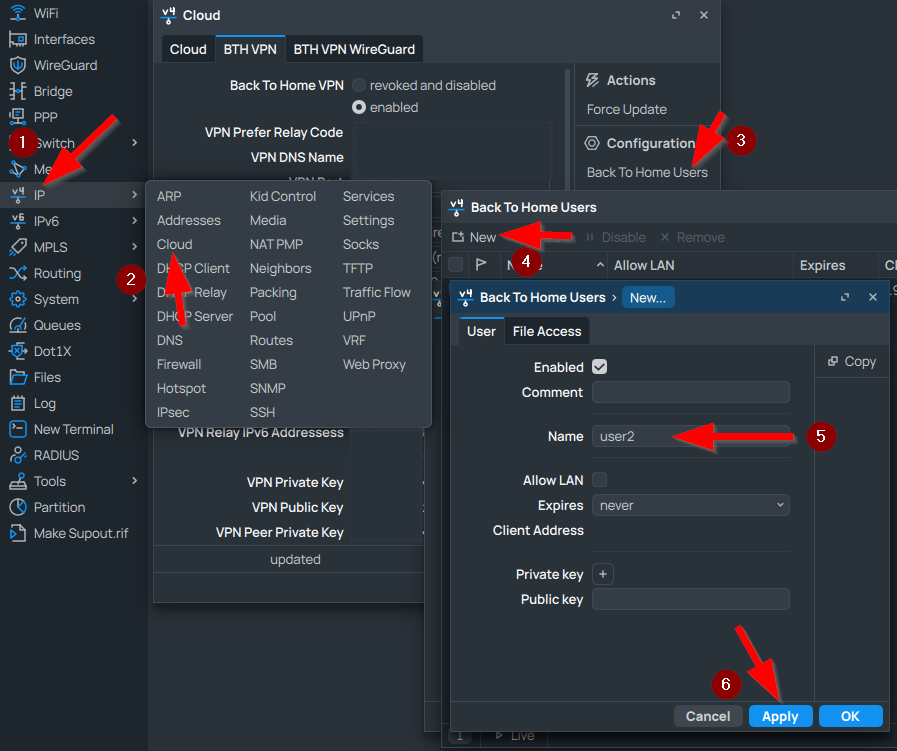
RouterOS CLI Command:
ip cloud back-to-home-user add name=user2
We have created a user that can only access our home internet, like a normal VPN client.
Sharing the user account for adding to the BTH APP via WinBox and CLI
When you share the account, you can only provide the QR code for it. To see the QR code for the user, go to the Config tab and scroll down. You might need to temporairly change your Winbox/Terminal to Light mode if you use Dark mode, and possibly shrink the text size.
RouterOS CLI Command:
ip cloud back-to-home-user show-client-config <usernum> #prints user's configuration and QR code in terminal, where <usernum> is the number of the user
Managing user’s rights for file sharing and LAN access via WinBox and CLI
Let’s say that we have decided to give them access to our file shares, or our locally hosted media library, or our IoT environment for example. We can edit the users at any time by double clicking the user and then allowing file/LAN access.
Note: You may need to reimport the user in your Back To Home App, when changing file access settings.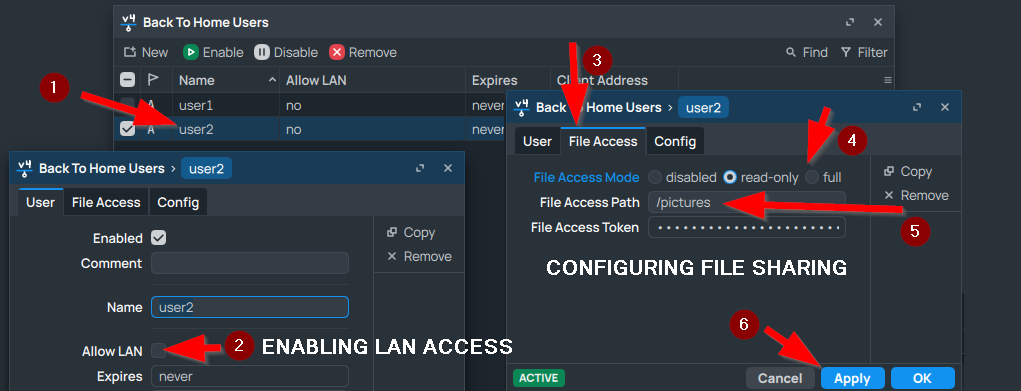
RouterOS CLI Command:
ip cloud back-to-home-user print #prints all Back to home users, take note of their user numbers
ip cloud back-to-home-user set <usernum> file-access=full file-access-path=<Path in Mikrotik Files> #allows file access on an existing user, where <usernum> is the number of the user
ip cloud back-to-home-user set <usernum> allow-lan=yes #allows user to access the local network
Creating a temporary user with expiration via WinBox and CLI
Let’s say that we want to add a third user to have temporary access to our network. You can assign the expiration date only at the time of creation. In the Expires field you can either assign either a date, or an interval. The date should be in format Year, month, day and time, as the date is separated by dashes, If you use interval instead, then it should be in format of active days, followed by the time (e.g. 2026-10-24 12:43:24 or 24d 10:10:00).
RouterOS CLI Command:
ip cloud back-to-home-user add name=user3 expires="<date or interval>" #creates a temporary user
Suspending/Deleting a user via WinBox and CLI
Each user can be either suspended or disabled. For that, after you selected the user, you can click on “Disable” to suspend a user, but keep its data, while clicking on “Remove” will delete the user. To unsuspend a suspended user, you can click the disabled user and enable it.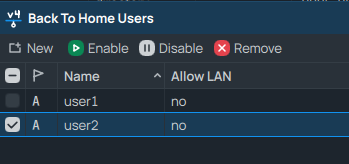
RouterOS CLI Command:
ip cloud back-to-home-user print #prints all Back to home users, take note of their user numbers
ip cloud back-to-home-user disable <usernum> #suspends the user
ip cloud back-to-home-user remove <usernum> #deletes the user
ip cloud back-to-home-user enable <usernum> #unsuspends/reenables the user the user
Important notes before we continue…
There are two types of connections for the Back to home users:
Normal (Privileged) connection – Can access home internet, LAN and files. Users using this connection can also create and share new users, as well as manage them. For managing File access rights and users, a RouterOS account with sufficient privileges is required.
Shared connection – Can access only home internet, LAN and files. It is distinguishable from the normal connections with a yellow arrow next to the connection.
Note: at the time of writing, each app treats all types of connection differently. You can check the following table to see what connection will be created/ imported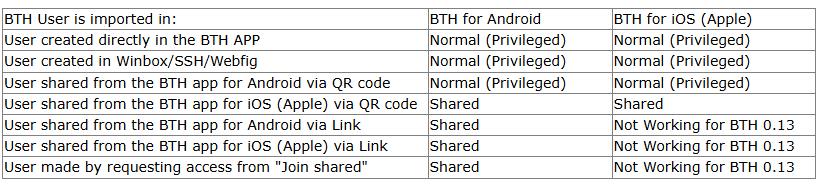
Versions at the time of writing: RouterOS v7.19.4 – BTH iOS 0.13 – BTH Android 0.43
Creating and managing Back To Home users with the BTH app
To be able to manage your user from the Back to home app, you must have a privileged/normal connection.
You can see all your users, by tapping the three dots in the connection profile and then choosing “Manage shares”.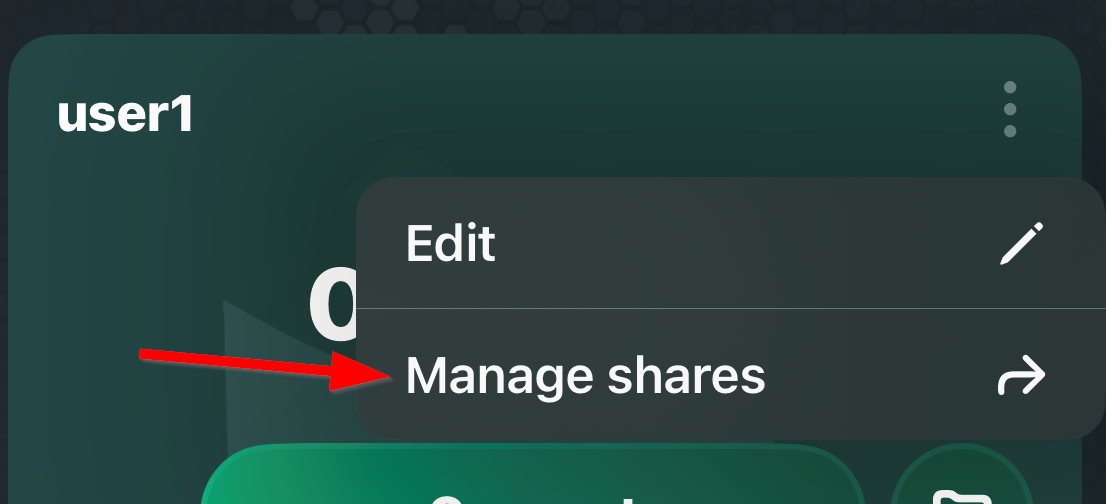
After that, it will prompt you for a RouterOS account. Enter your RouterOS credentials and tap on connect.
From there you will see all the users as well as their allowed access. 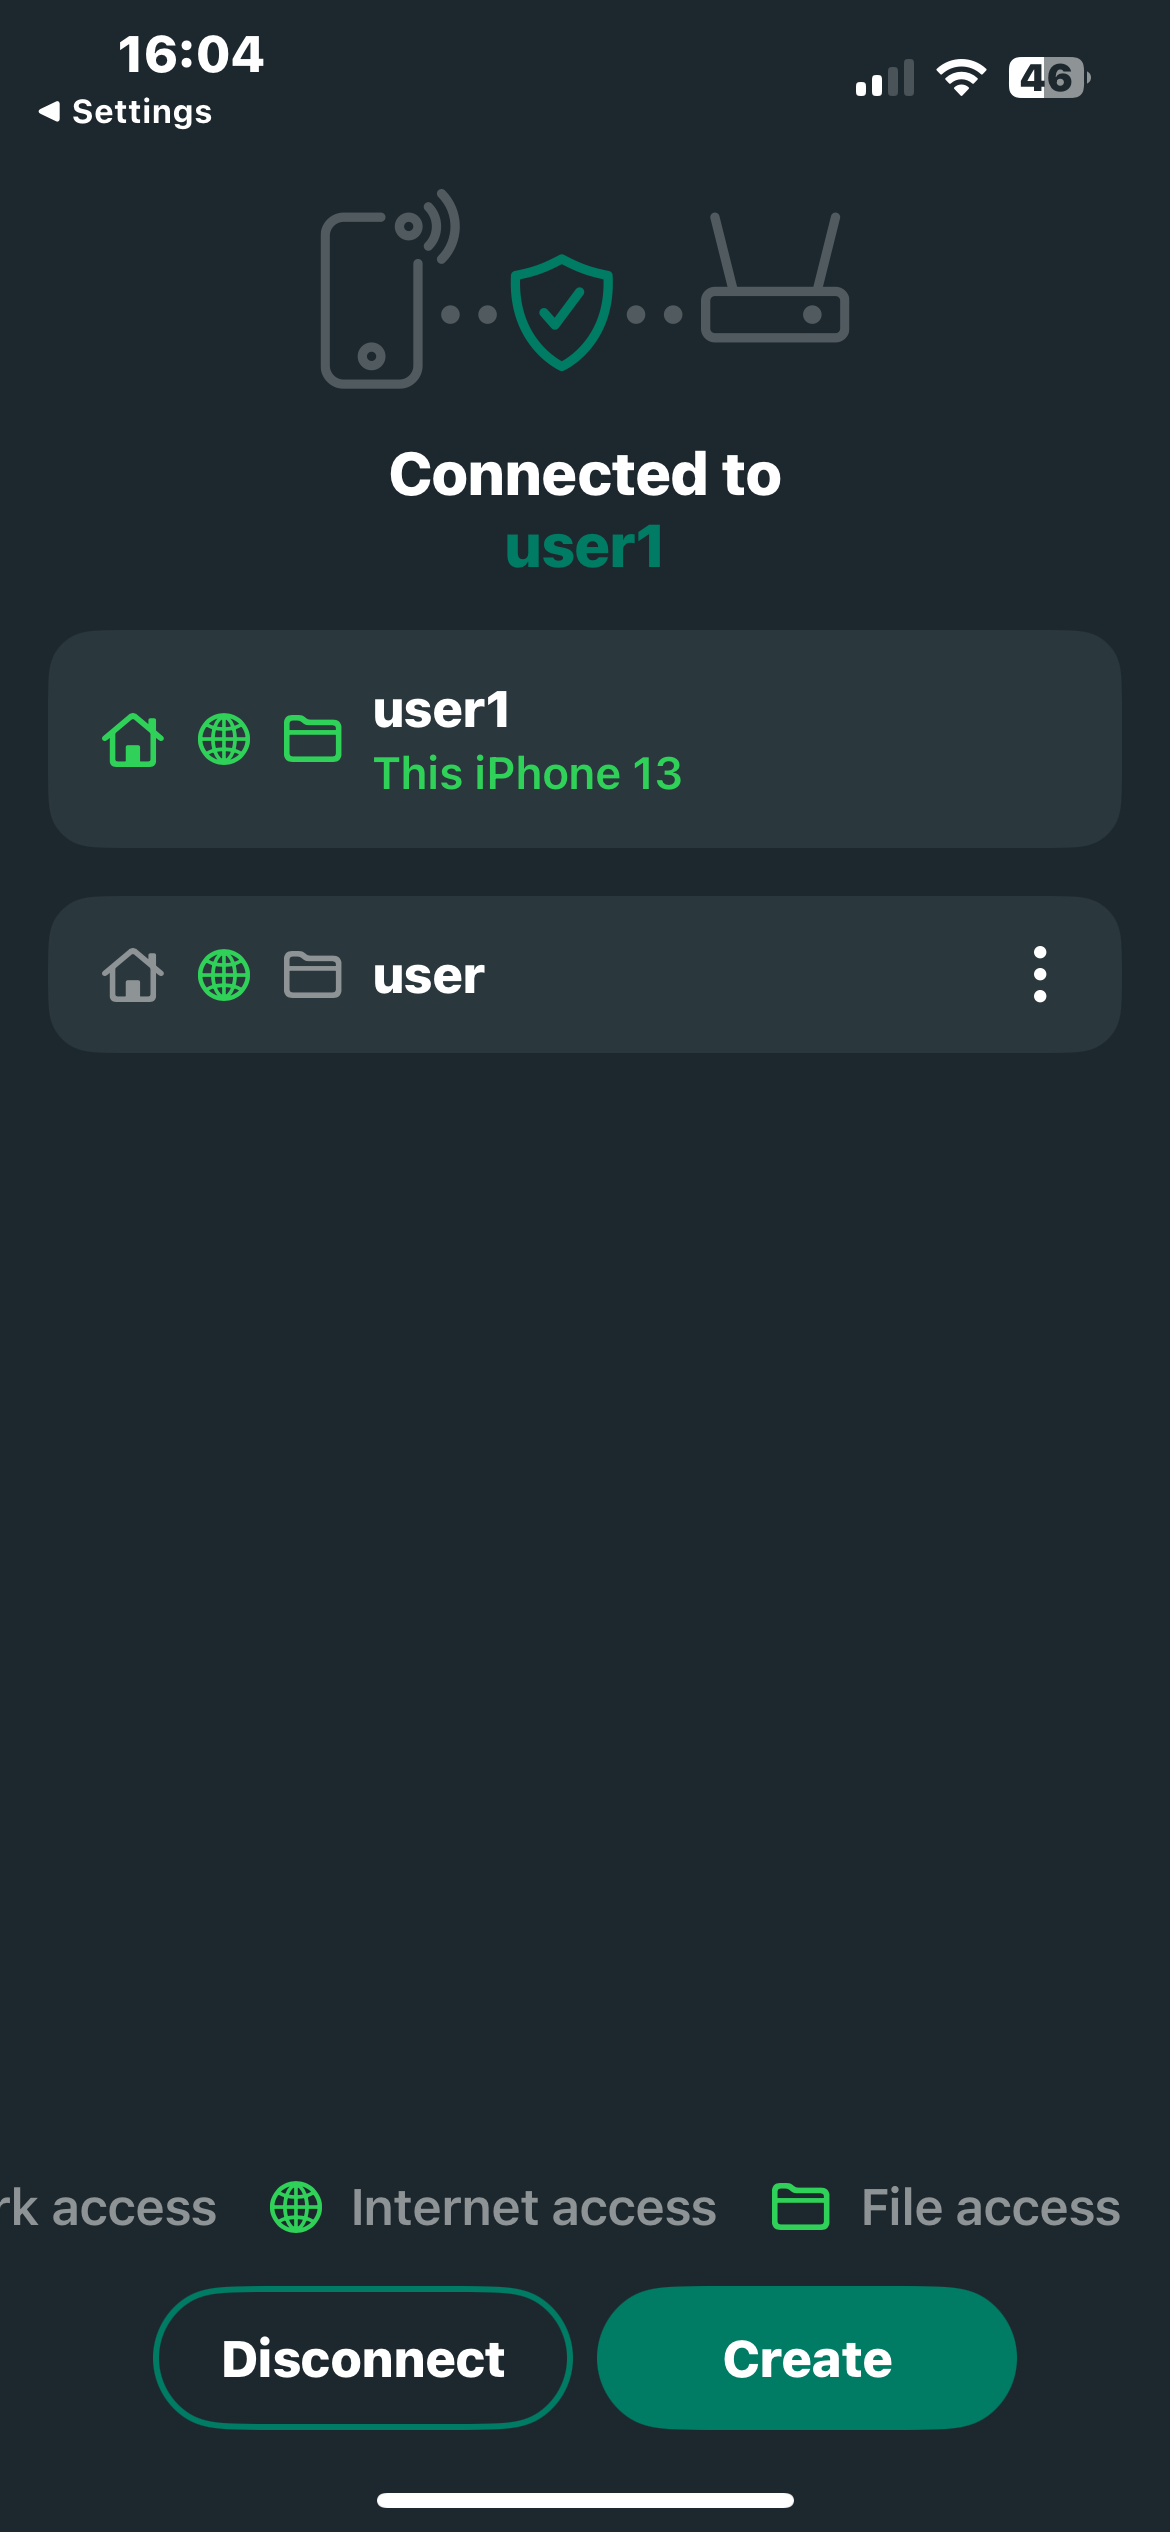
Creating a user with only internet access via the BTH APP
To create a new user, tap on “Create”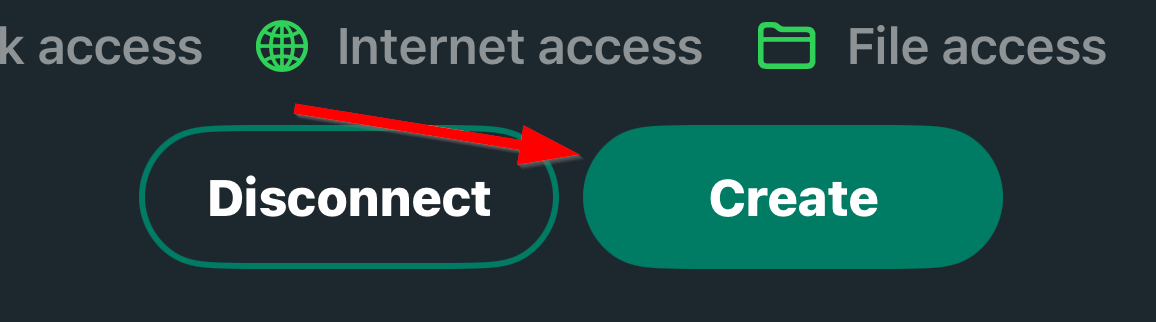
On the setup screen you can set the tunnel name, expiry date, access and IP/DNS settings. To manage the File and LAN Access, note that the “Use Router DNS” and “Expiration date” options are configured only in the beginning and cannot be changed later. For now we will proceed with the default settings.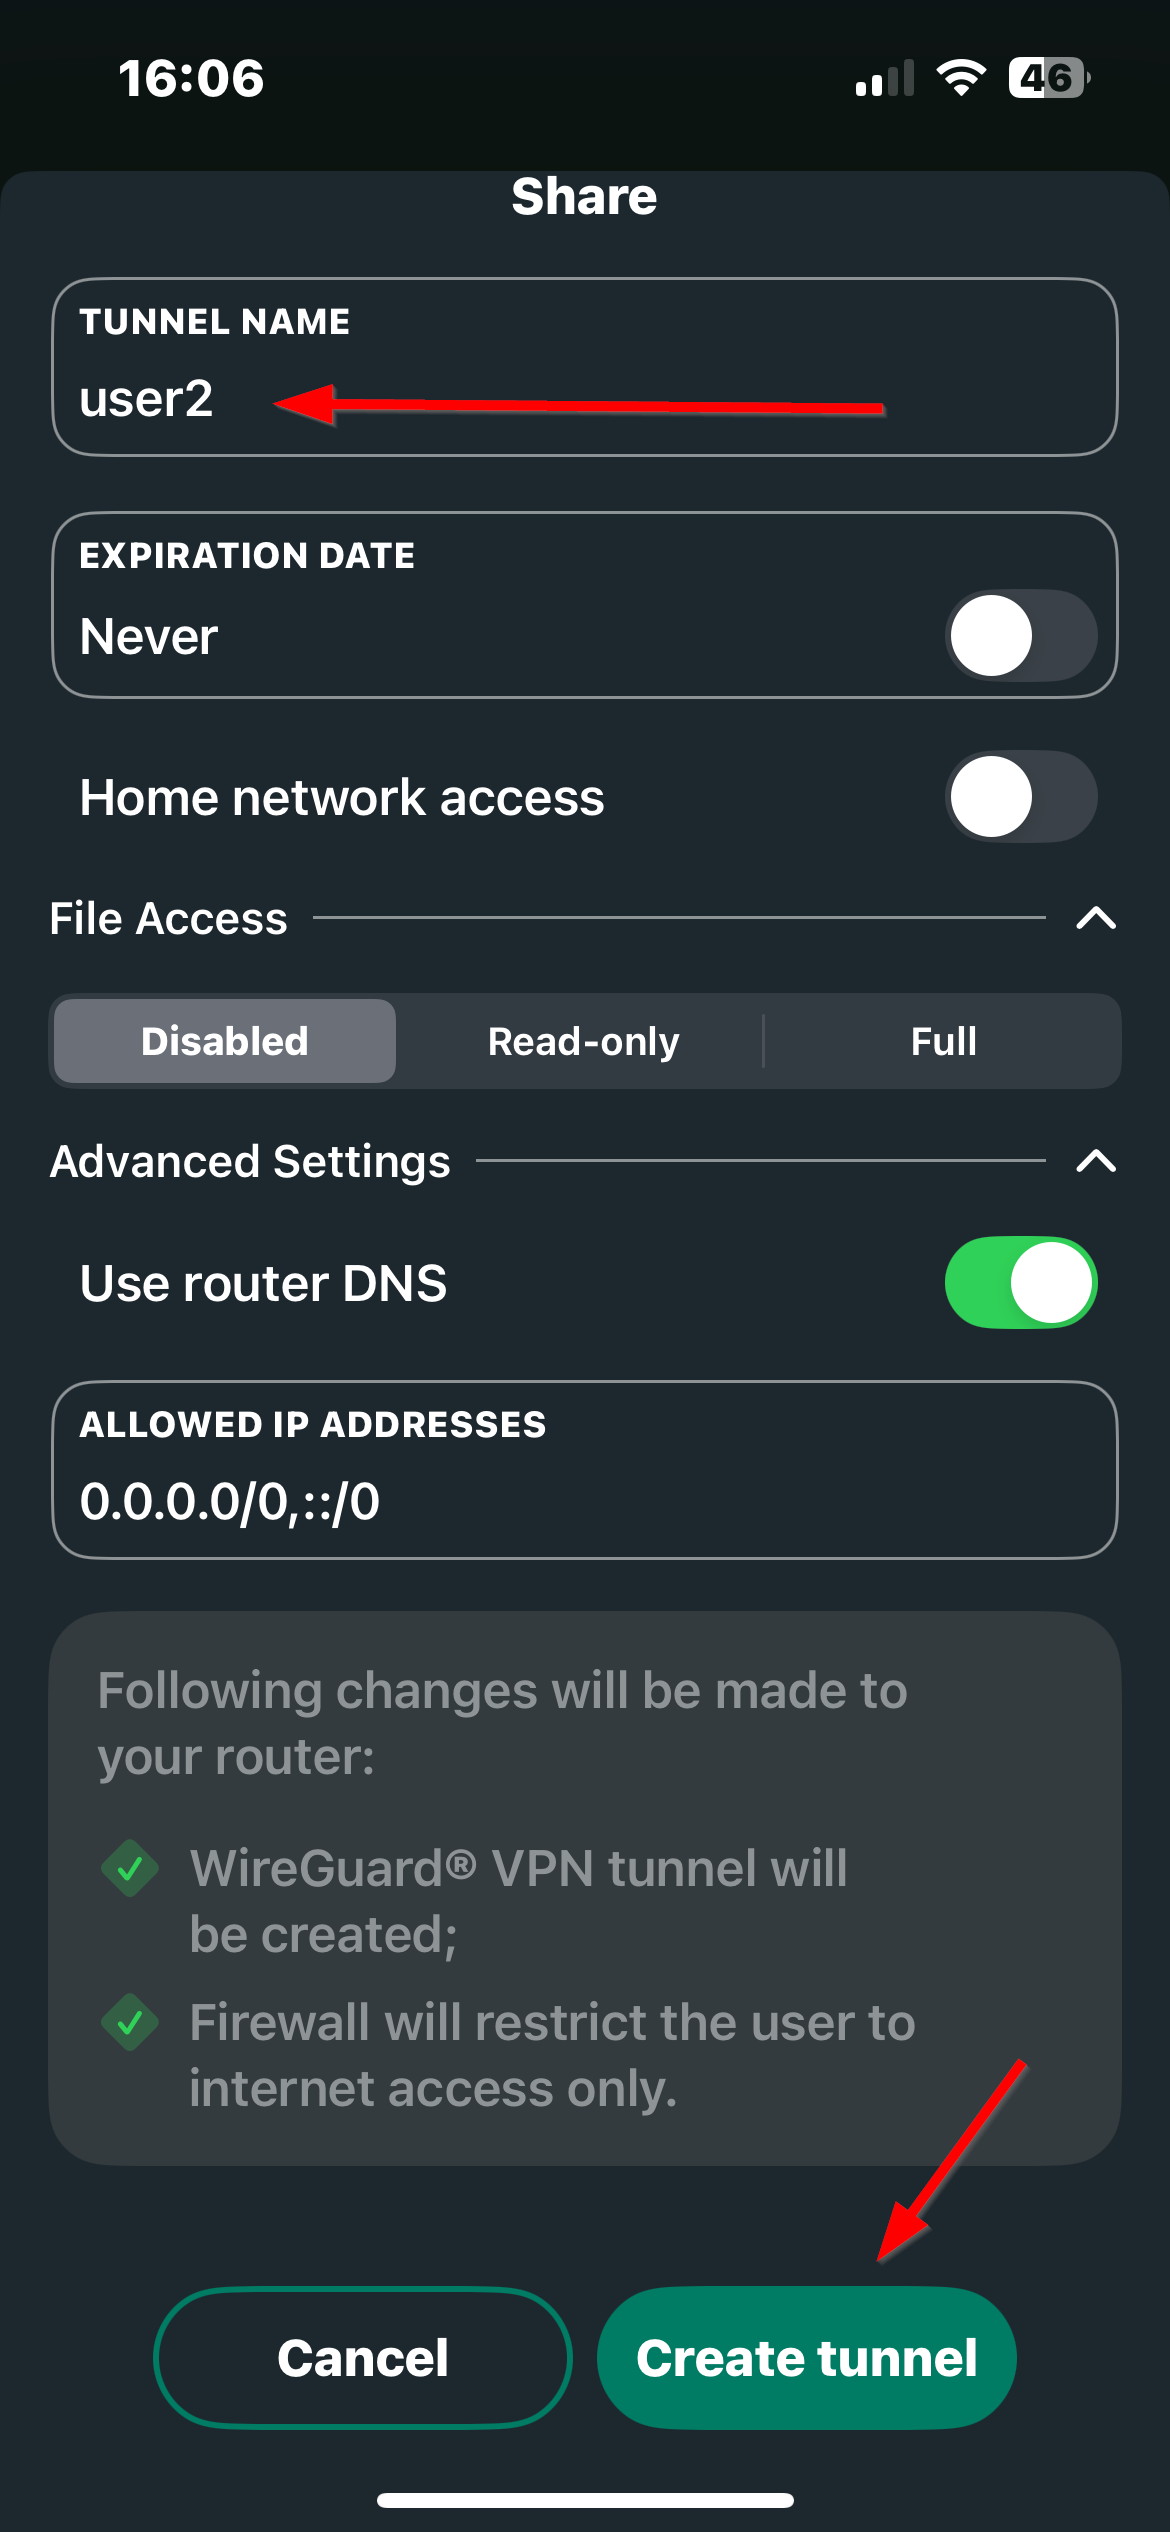
Managing user’s rights for file sharing and LAN access via the BTH APP
Let’s say we want that user to have access to our files as well, for that we can tap on the user we want to change the rights.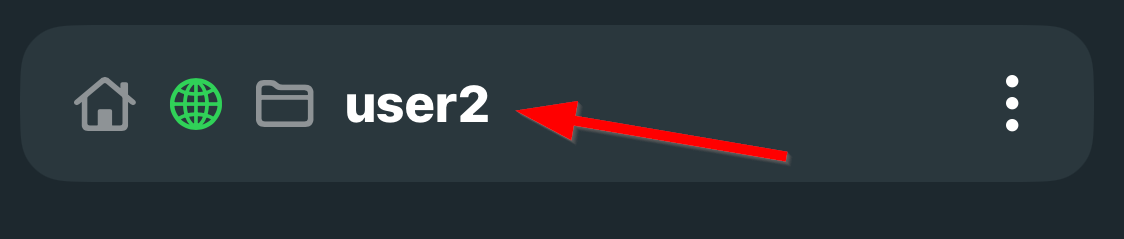
After that we can allow access to our LAN or change the file sharing settings by tapping on the corresponding menus and switches.
Note: You may need to reimport the user in your Back To Home App, when changing file access settings.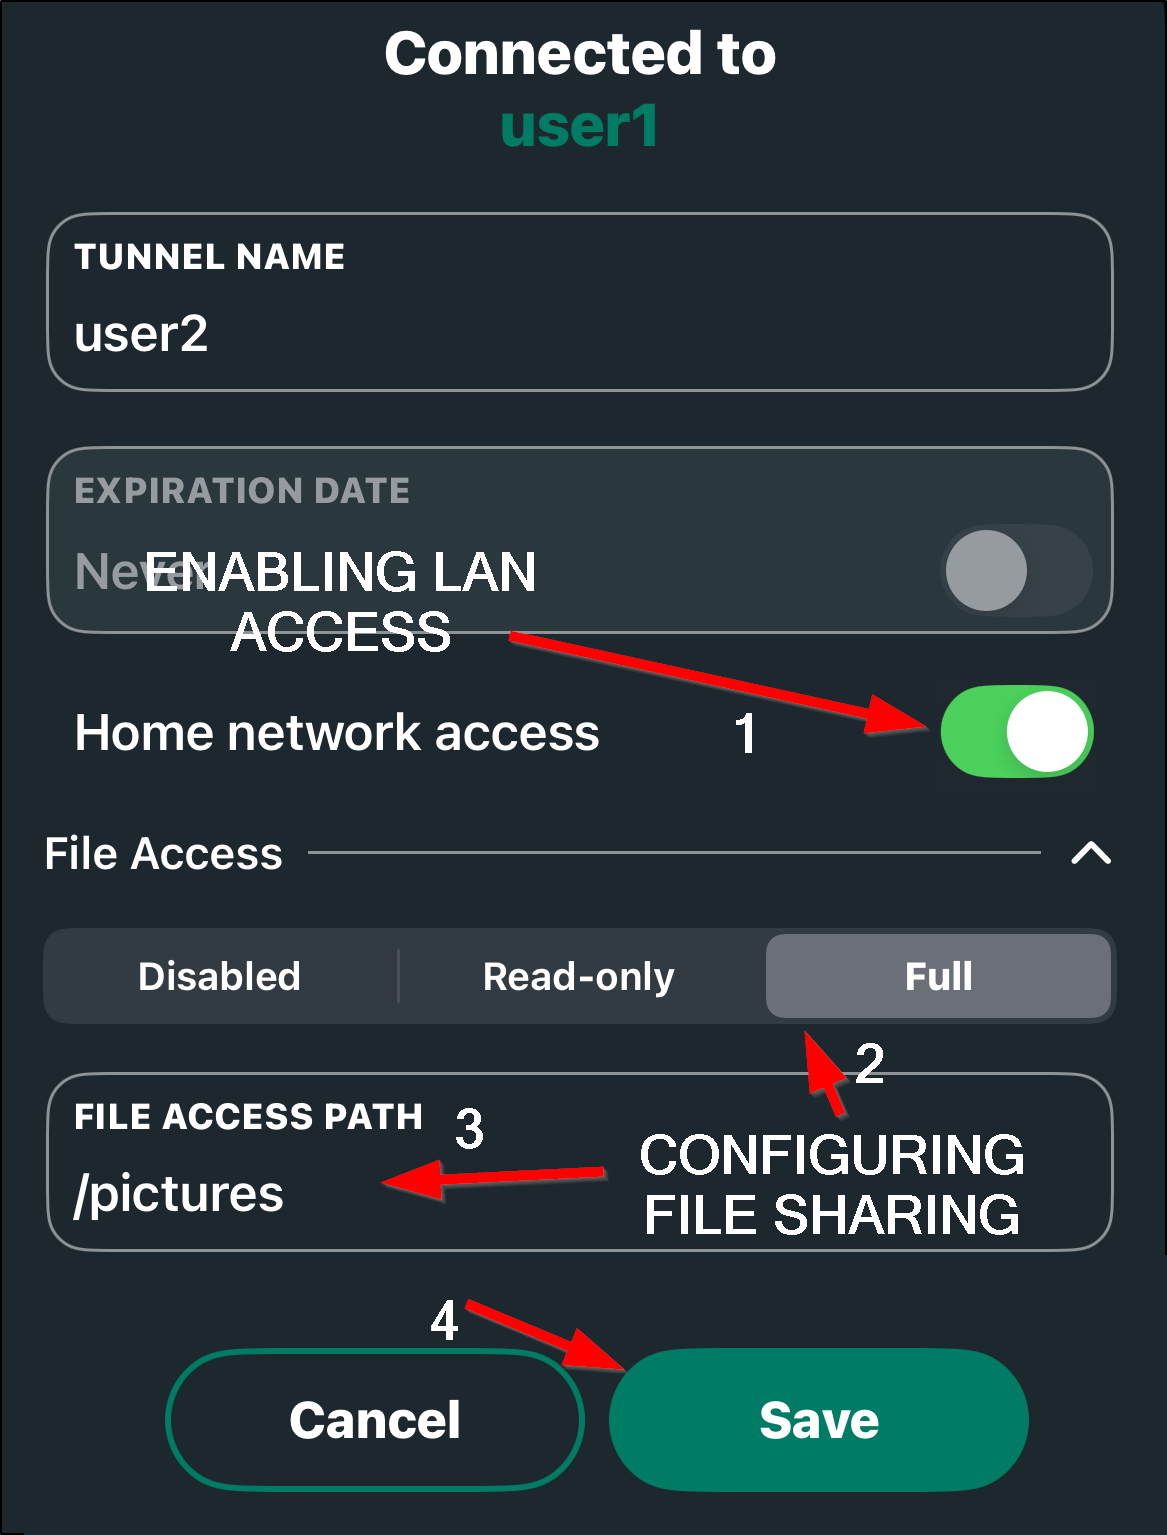
Creating a temporary user with expiration via the BTH APP
To create a user with temporary access, you can use the expiration date field while creating the account and choose a date and time when it will be disabled.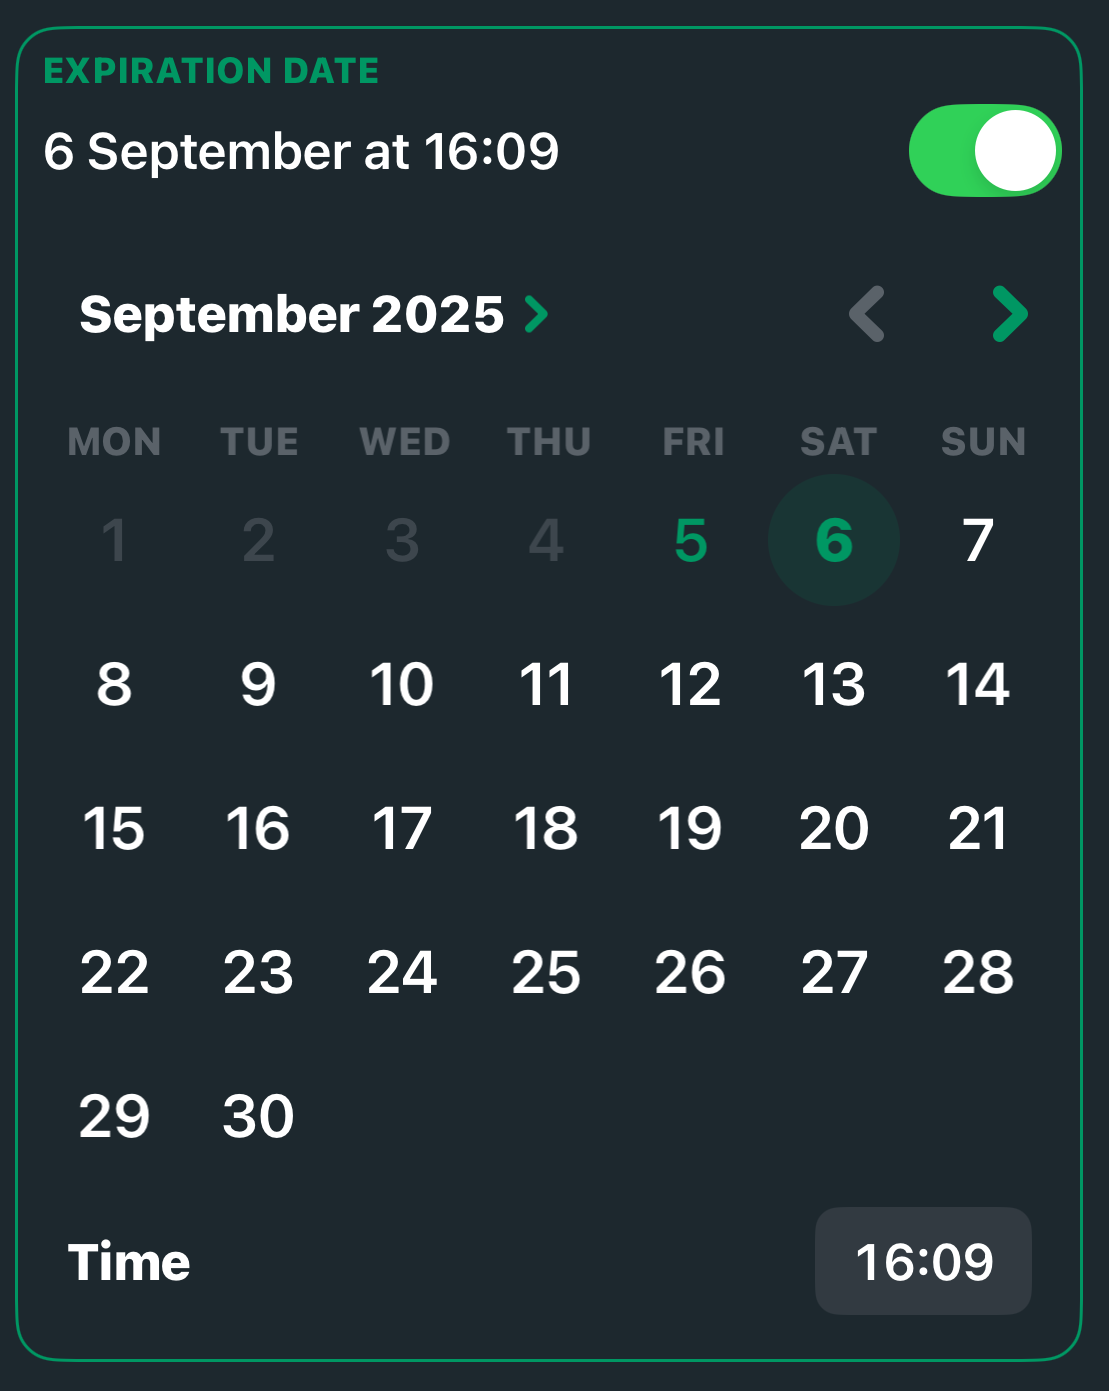
Additional management and sharing via the BTH APP
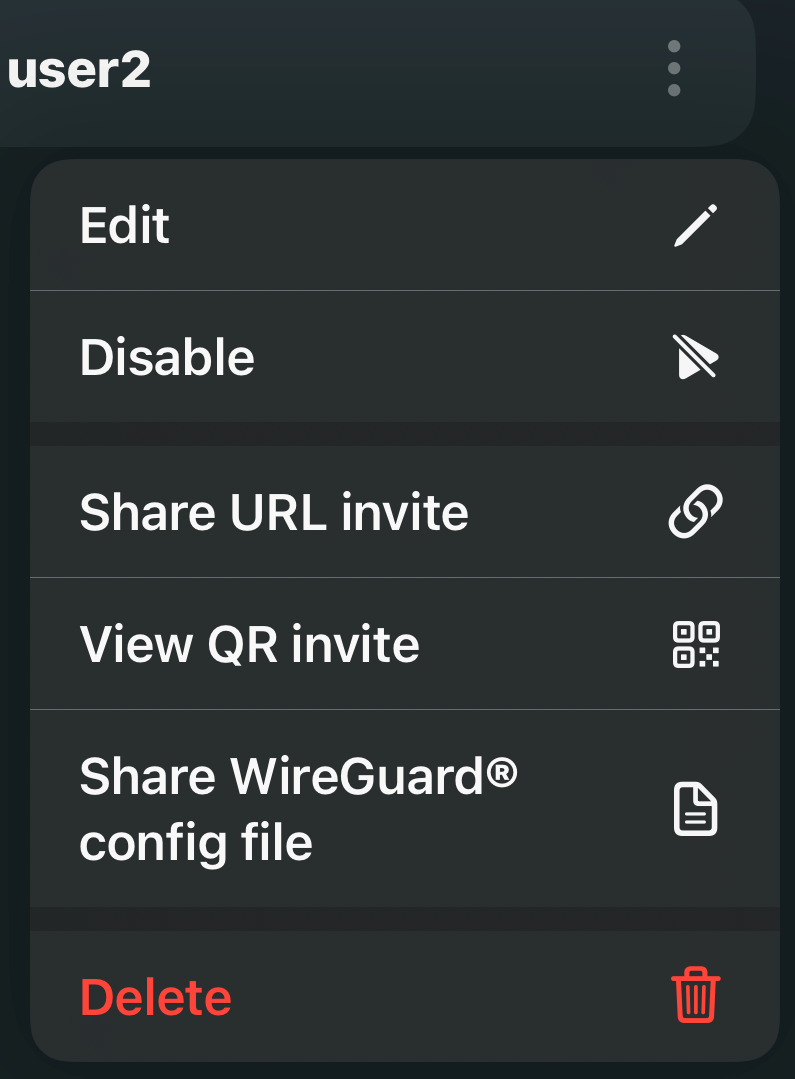
To Suspend, unsuspend or delete the user. you must tap on the three dots next to the user you wish to remove.
From there you can also share it's wireguard configuration file, QR code, and link.