
MikroTik CHR Licensed - Applying the included license (+ video)
This article applies only to the MikroTik Cloud Hosted Router — Licensed or higher packages, which include the P1 license. If you're on a smaller package, you don't need to follow these steps, but rather activate your CHR with your own license.
The P1 license included with these packages can't be applied automatically — our support team needs to log in to your router once to set it up. The whole process only takes a few minutes on your end: you create a temporary account for us, open a ticket with the credentials, and we take it from there. Once we confirm the license is active, you can disable or delete our account.
Here's a short video walkthrough if you'd prefer to follow along visually:
Table of Contents
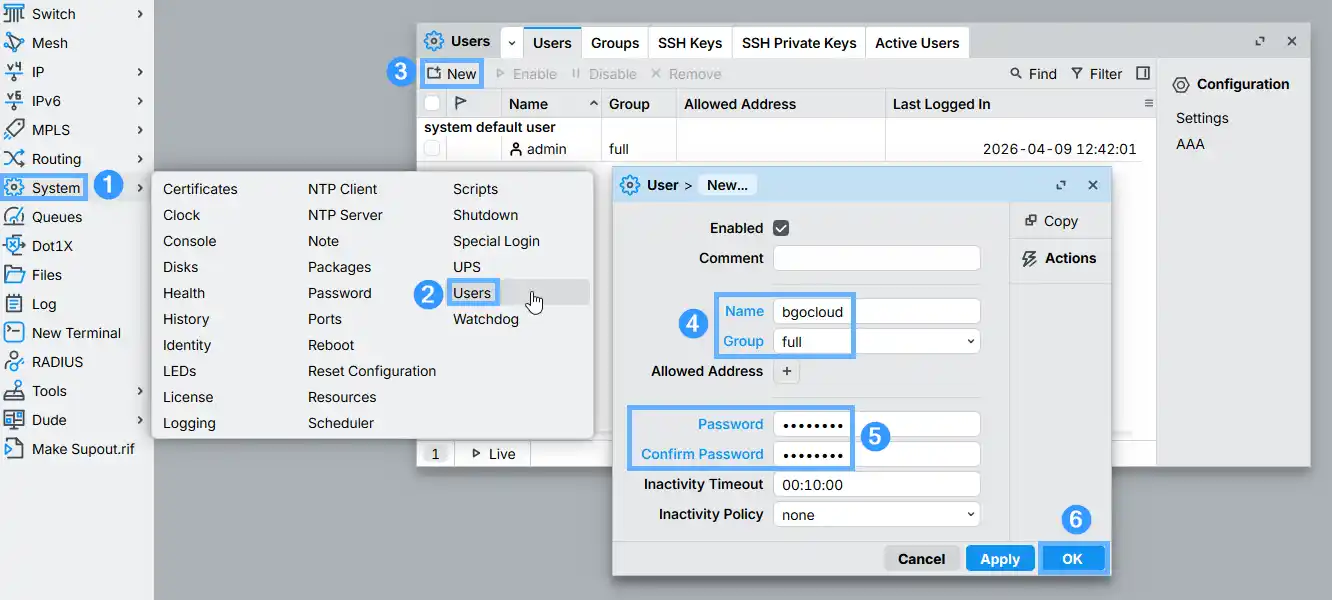
Log in to your new router via WinBox or Webfig, go to System > Users, and click New. Fill in the fields as follows:
- Name:
bgocloud - Group:
full - Password / Confirm Password: a password of your choice — you'll be sending this to us in the next step
Click OK to save the user.
If you prefer the command line, the equivalent SSH command is:
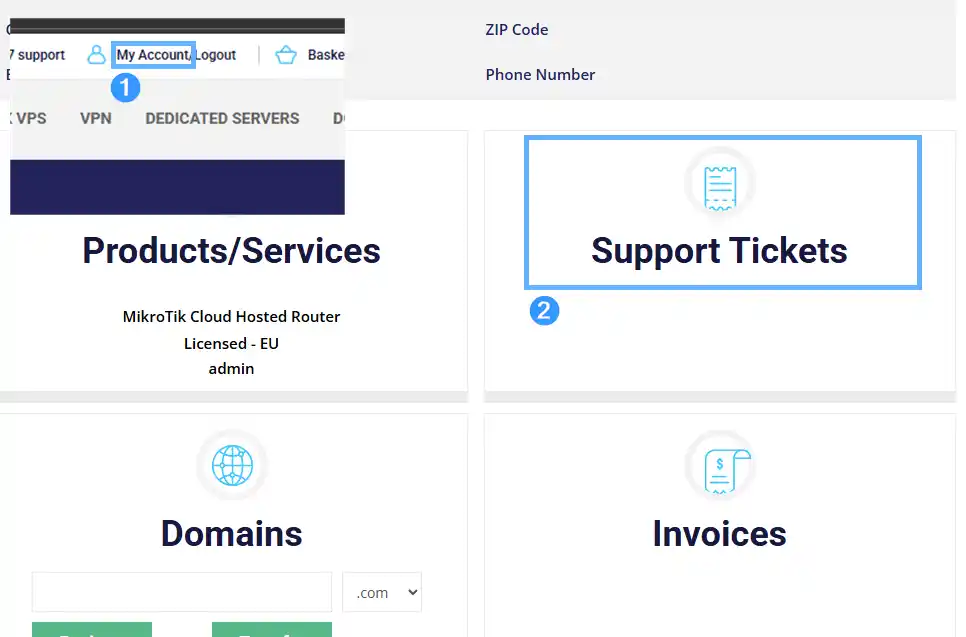
YourPasswordHere with the actual password you set. You'll need to share it with us in the next step, so avoid using a password you use elsewhere.Head over to the BGOcloud client area. Log in if you haven't already, then click My Account in the top navigation bar and go to the Support Tickets section.
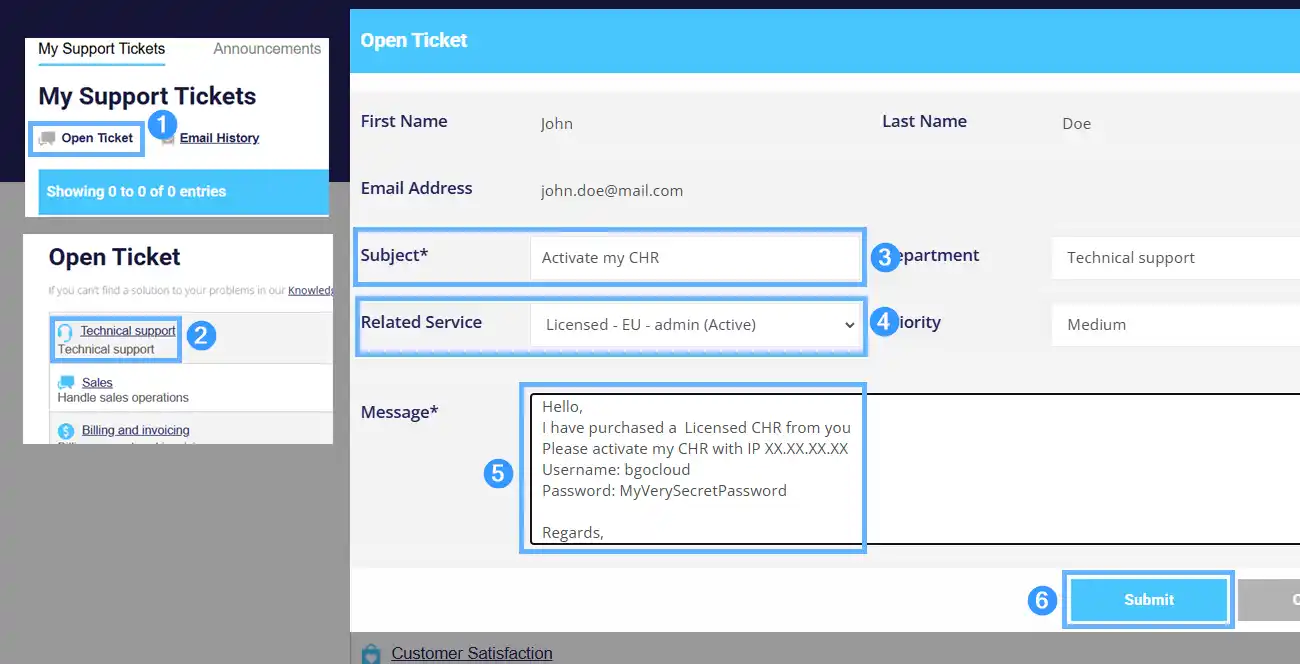
Click Open Ticket, then select the Technical support department. Fill in the ticket as follows:
- Subject: Activate my CHR
- Related Service: select your newly purchased Licensed CHR from the dropdown
- Message: include the username (
bgocloud) and the password you set in Step 1. If you have more than one CHR instance on your account, please also include the IP address of the router you want licensed.
Click Submit when you're ready.
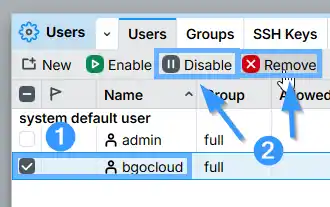
We'll process your request as quickly as we can and reply to the ticket once the license has been applied. Once you see our confirmation, you can go to System > Users, select the bgocloud user, and either click Remove to delete it entirely or Disable to keep it around in case you need to reach out to our support team again in the future.
That's all there is to it. If you have any questions or run into any issues during this process, feel free to reach out — we're happy to help.
Looking for a MikroTik Cloud Hosted Router? Check out BGOcloud's MikroTik VPS plans — full RouterOS access, SSD performance, and unlimited traffic options, ready in under a minute.