MikroTik CHR: How to set-up PPTP VPN Server (+ video)
A quick guide to configure Mikrotik CHR as PPTP VPN Server.
Here's a small video explaining the process:
For L2TP VPN Server - check the end of this article!
Both Command Line Interface and WinBox way:
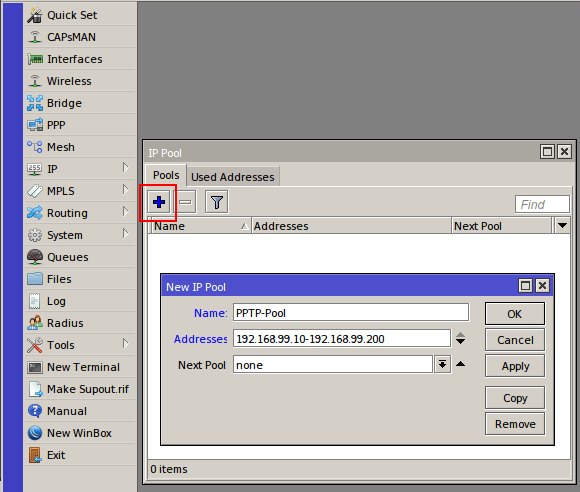
1. Add Pool of IP-Addresses to be used with this service
[admin@MikroTik] > ip pool add name=PPTP-Pool ranges=192.168.99.10-192.168.99.200
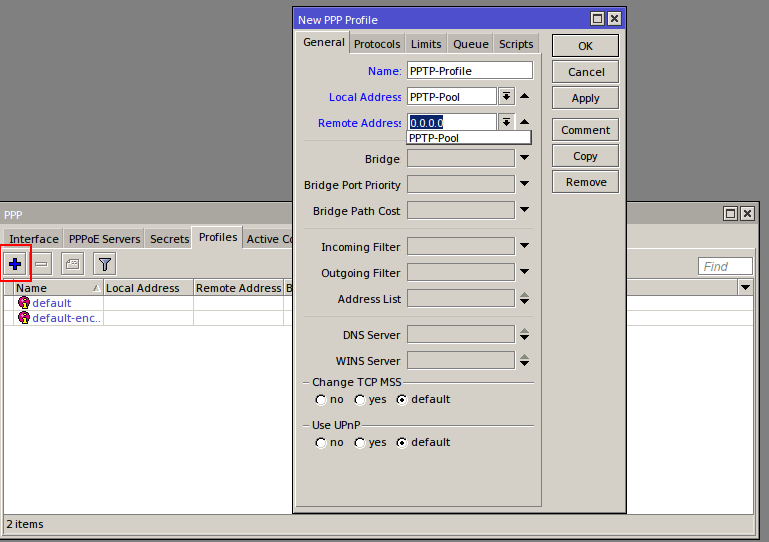
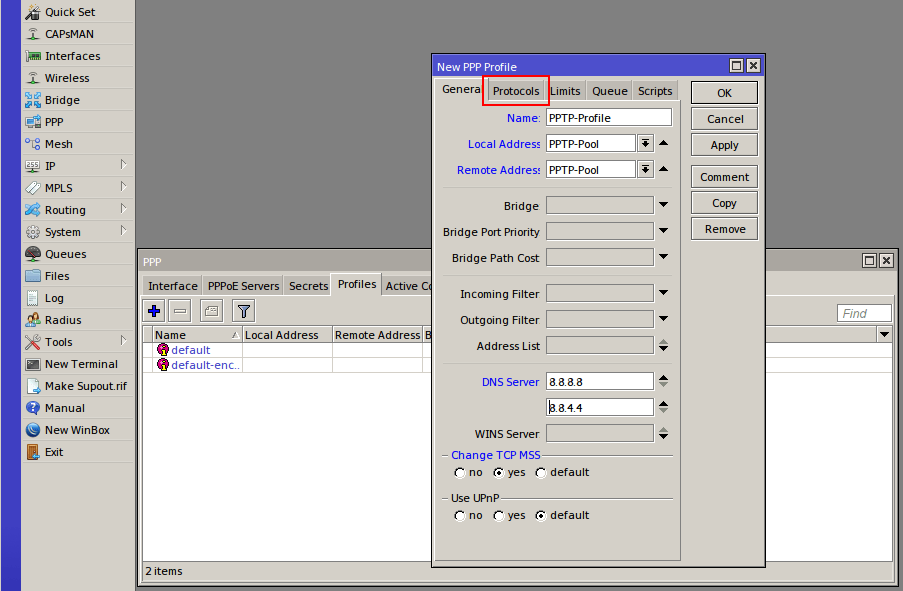
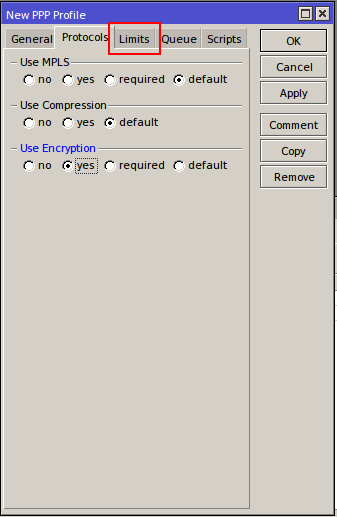
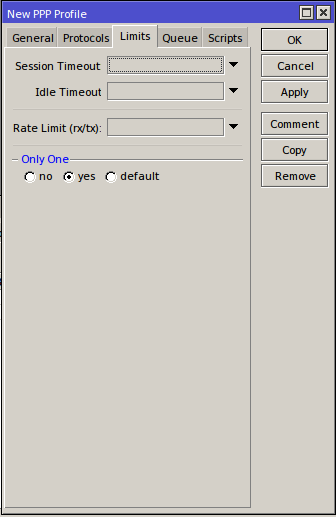
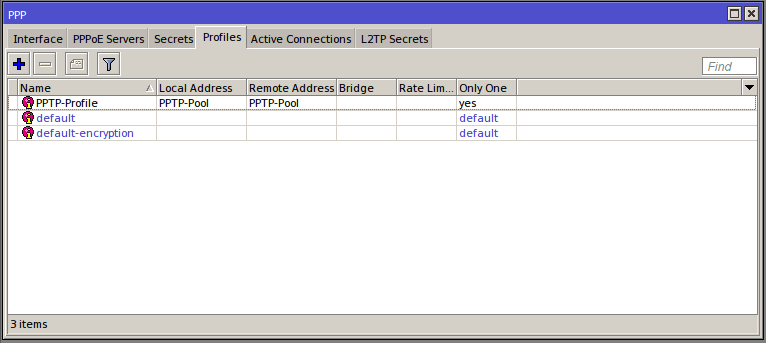
2. Create "Profile"
[admin@MikroTik] > ppp profile add change-tcp-mss=yes local-address=PPTP-Pool name=PPTP-Profile only-one=yes remote-address=PPTP-Pool use-encryption=yes dns-server=8.8.8.8,8.8.4.4
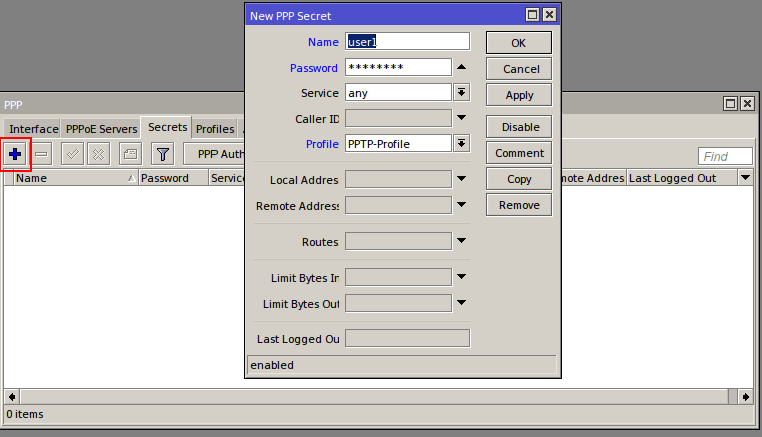
3. Create "Secrets" for users/computers that will access the VPN.
[admin@MikroTik] > ppp secret add name=user1 password=p@sSword1 profile=PPTP-Profile
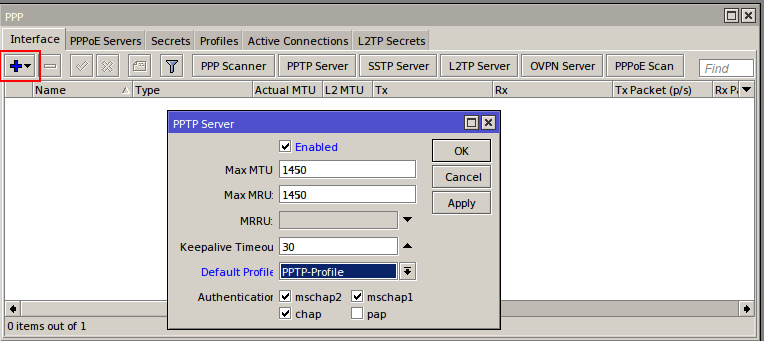
4. Enable PPTP Server
[admin@MikroTik] > interface pptp-server server set authentication=chap,mschap1,mschap2 default-profile=PPTP-Profile enabled=yes
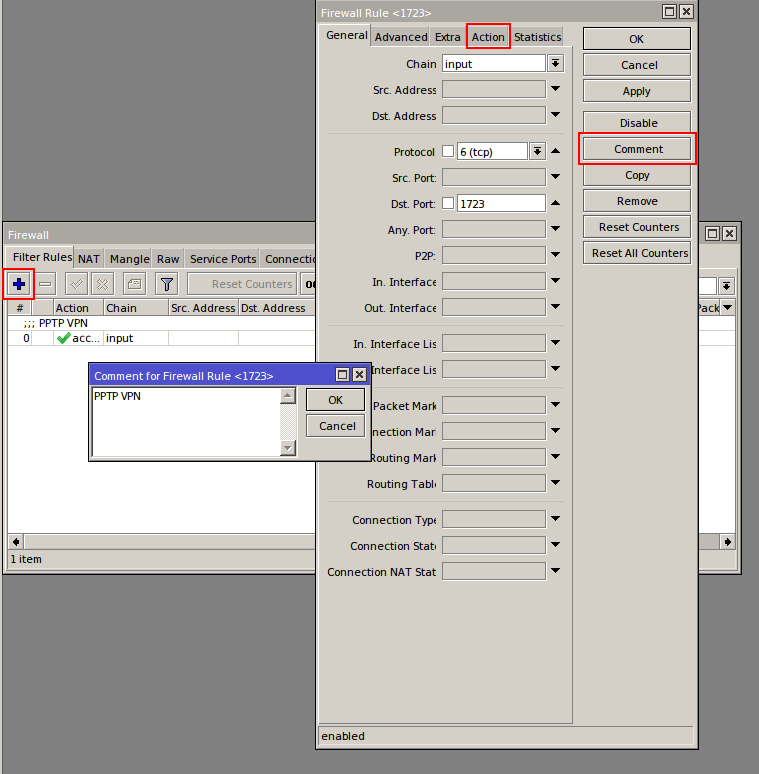
5. Accept incoming connections in the firewall:
[admin@MikroTik] > ip firewall filter add chain=input comment="PPTP VPN" dst-port=1723 protocol=tcp

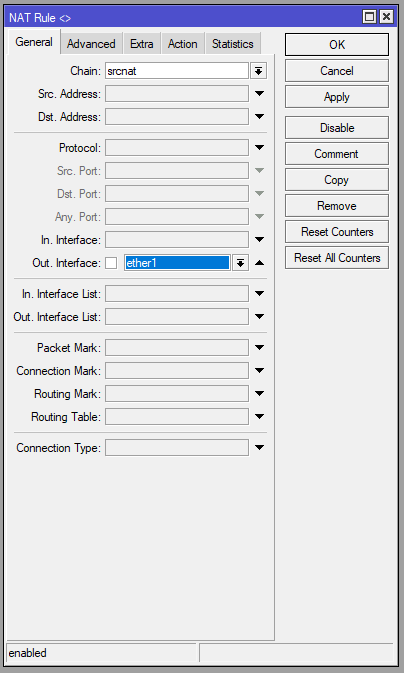
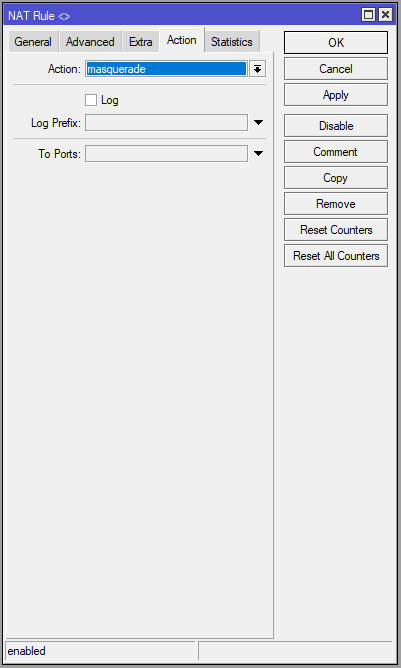
6. Enabling NAT in firewall for internet access:
[admin@MikroTik] > ip firewall nat add chain=srcnat out-interface=ether1 action=masquerade


Optional settings:
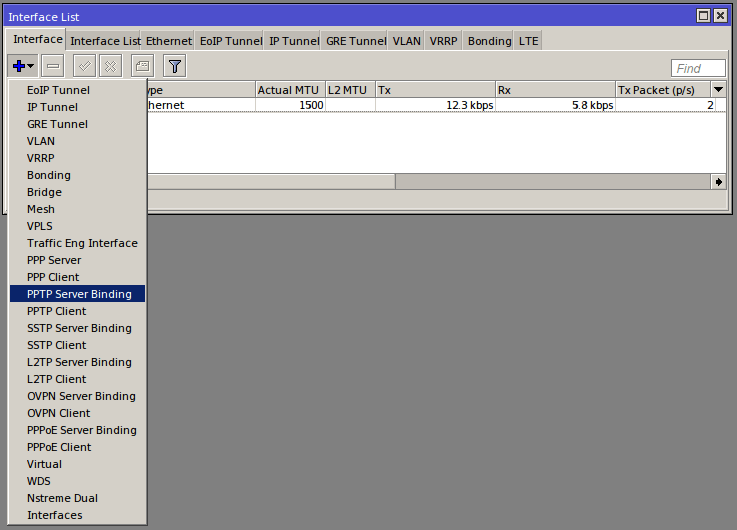
7. Setup binding interface based on username of the "caller"
With this You will be able to set the binding interface in firewall rules if needed and apply specific policies on the interface/user
[admin@MikroTik] > interface pptp-server add name=pptp-user1 user=user1
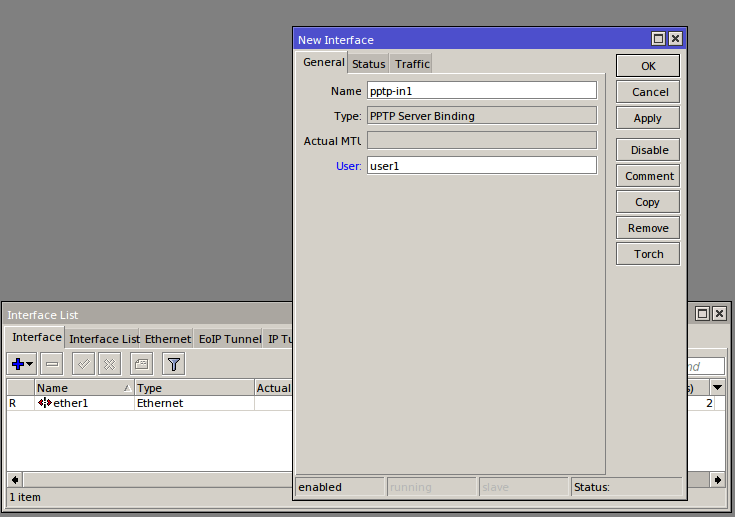

Now Your MikroTik Router is ready to serve PPTP VPN Connections!
Learn How to set-up L2TP VPN Server. VPN server for Apple devices - Iphone, MacBook.
More details about PPTP in MikroTik's RouterOS Here.
Take a look at our powerful MikroTik VPS servers and choose a suitable plan to get started.

